|
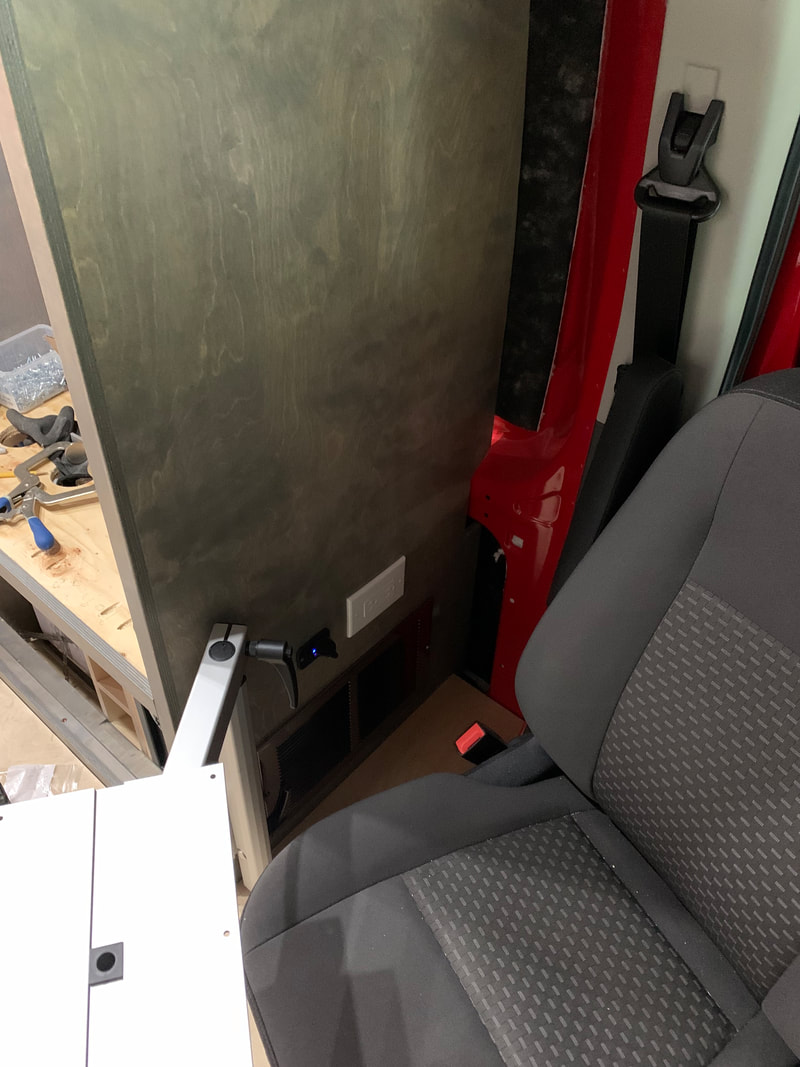
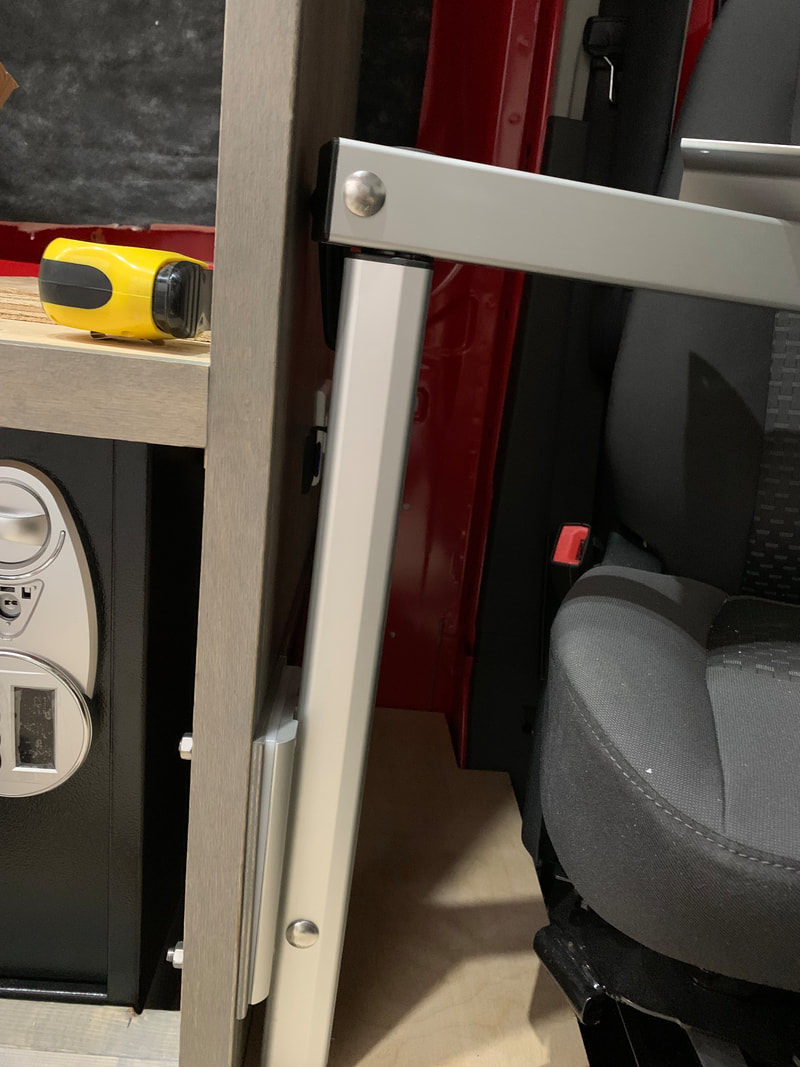
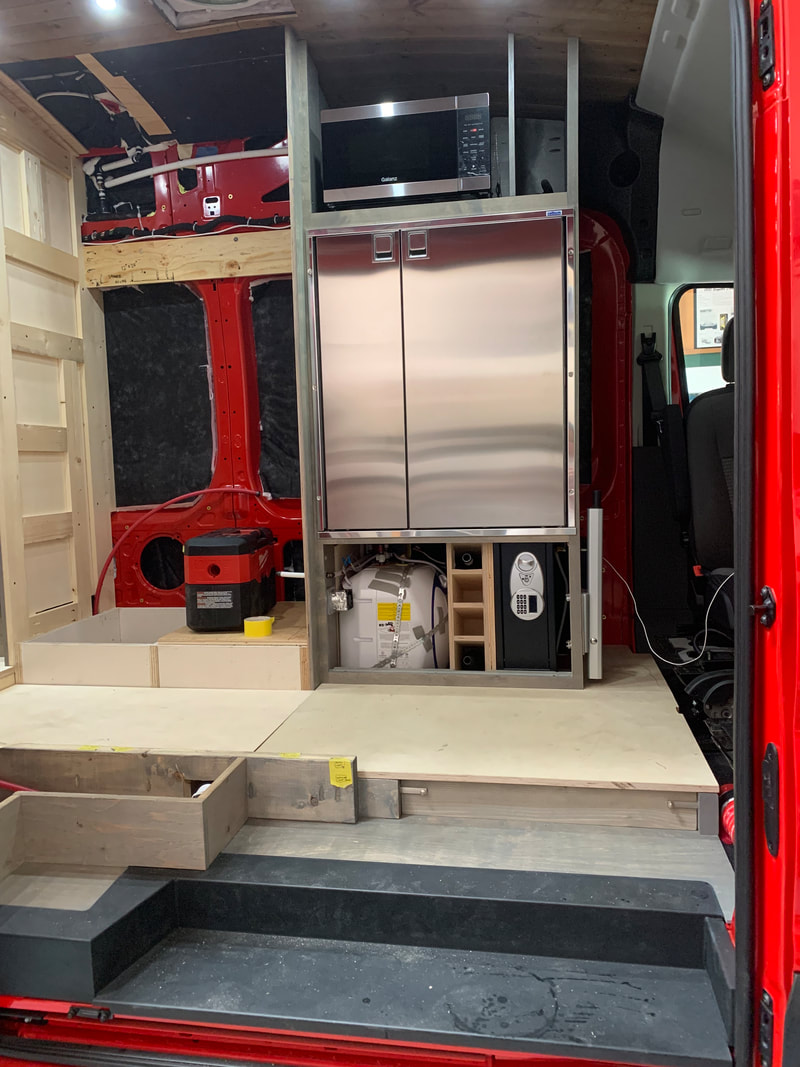
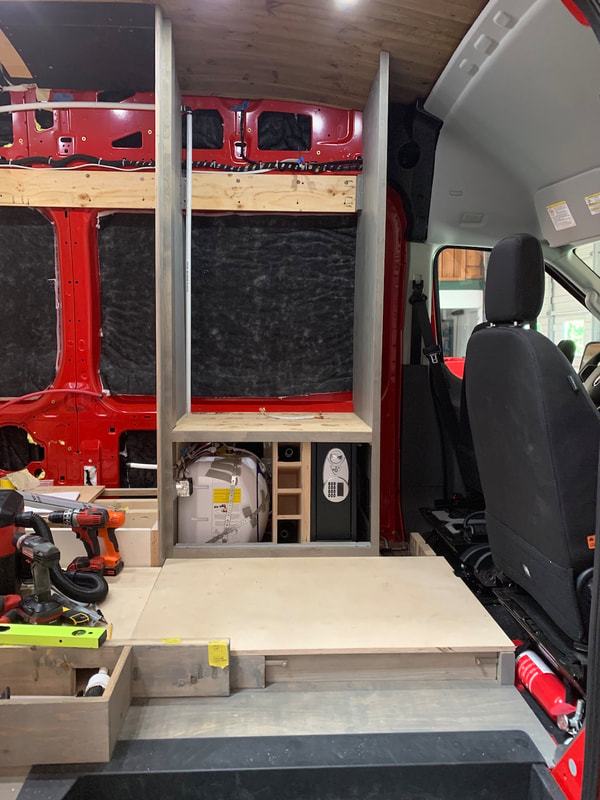
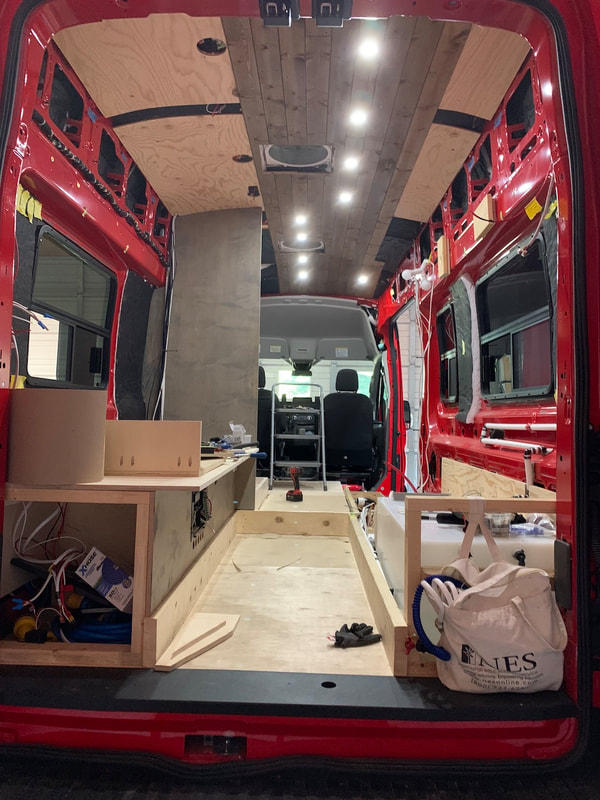
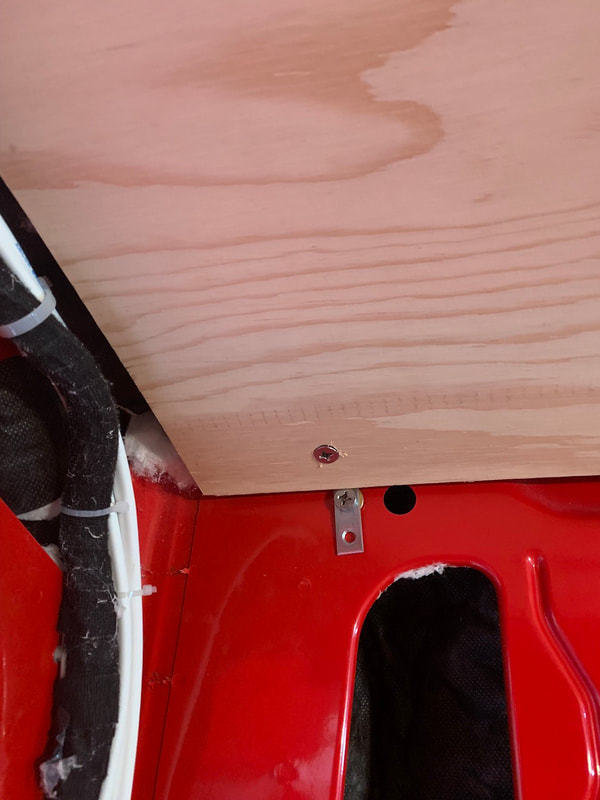
The cabinet was all prepped a few days ago and waiting for some extra hands to install the fridge. Today cousin Tony stopped by for a visit and I got him to help lift the fridge into Redford and into place. We lifted it in the sliding door, connected the 12V wires and passed the 110V cord through the shelf and the fridge went into place. Overall the fit is great and I got some stainless steel screws to secure it into cabinet. Other work that has been accomplished includes completing the wood linings for inside the passenger side dining bench (sleeping area) and planning out how I'm going to construct the walls and window frames. In the appliance cabinet the microwave/convection oven got secured and the Lagun table mount was attached to the panel.
0 Comments
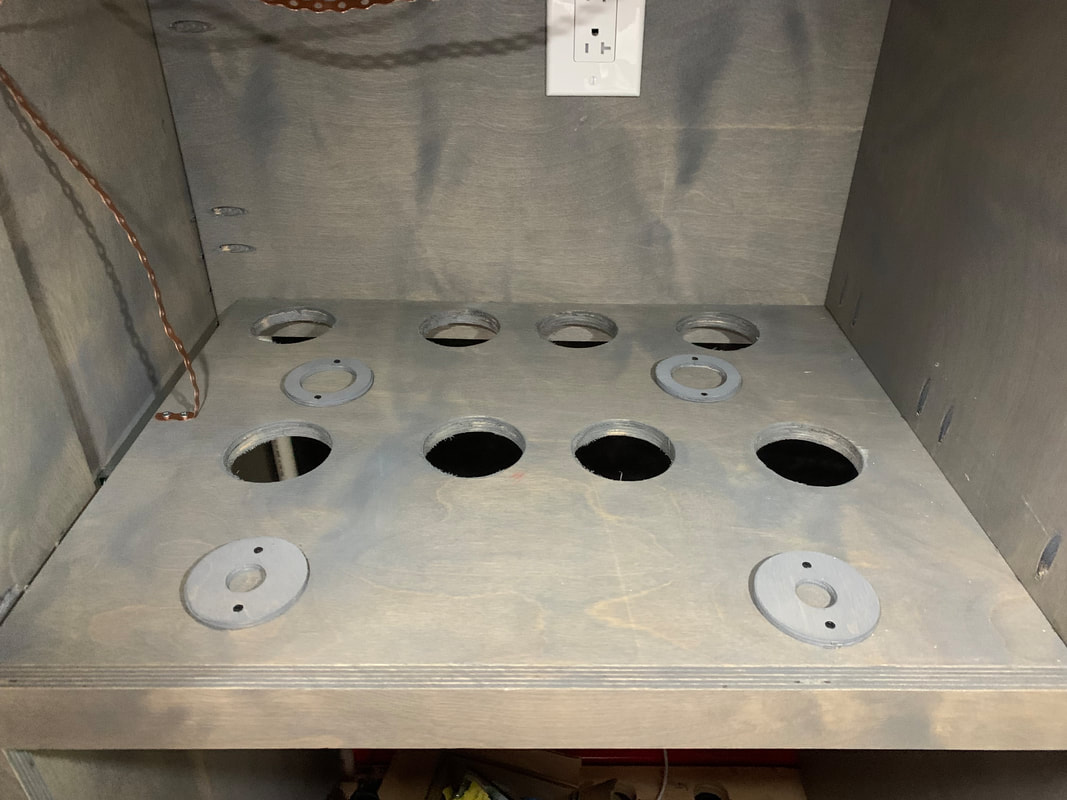
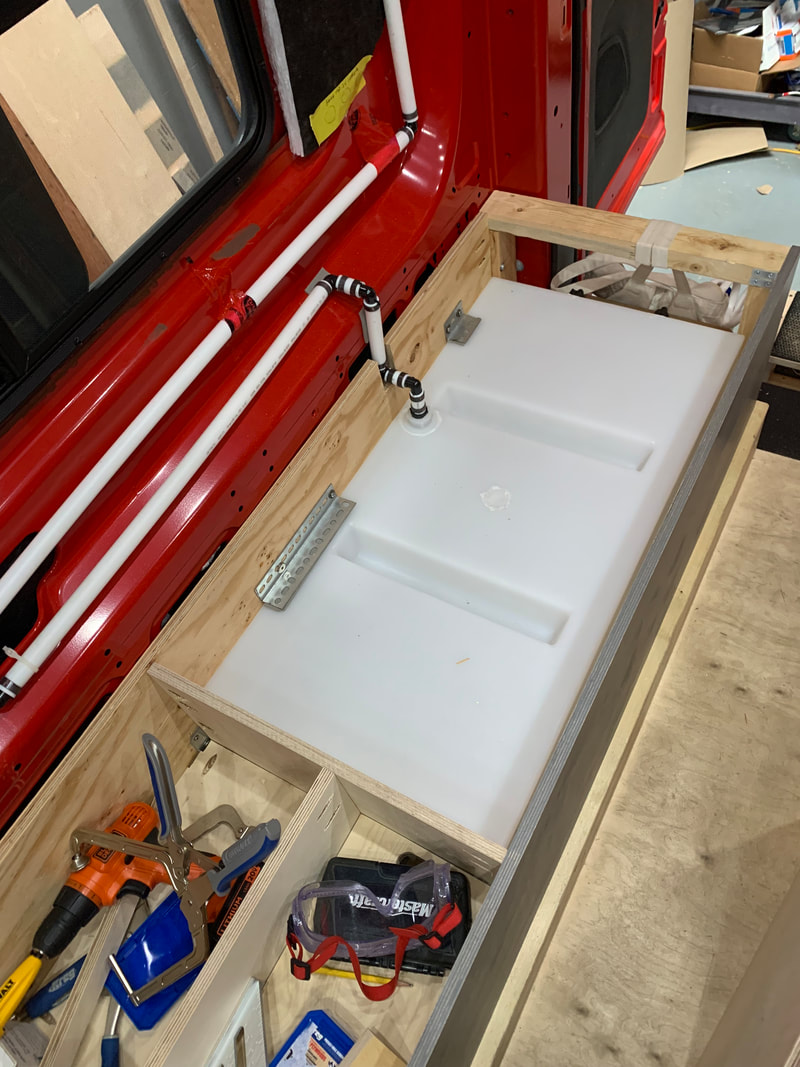
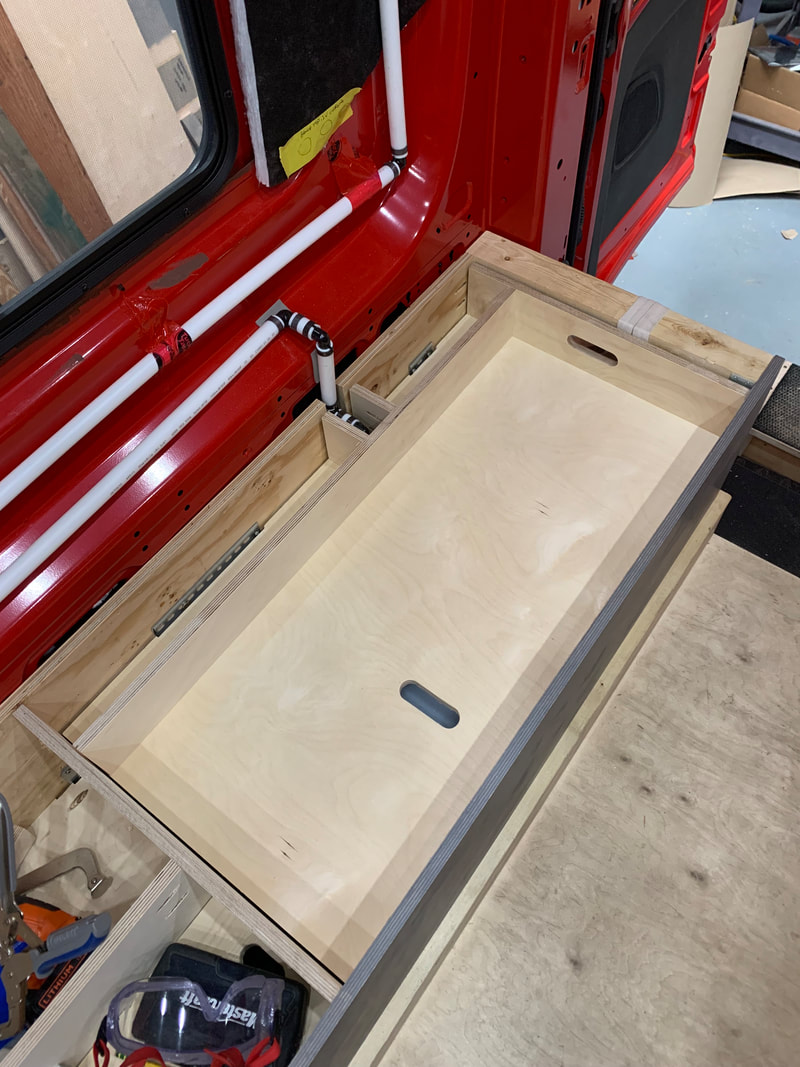
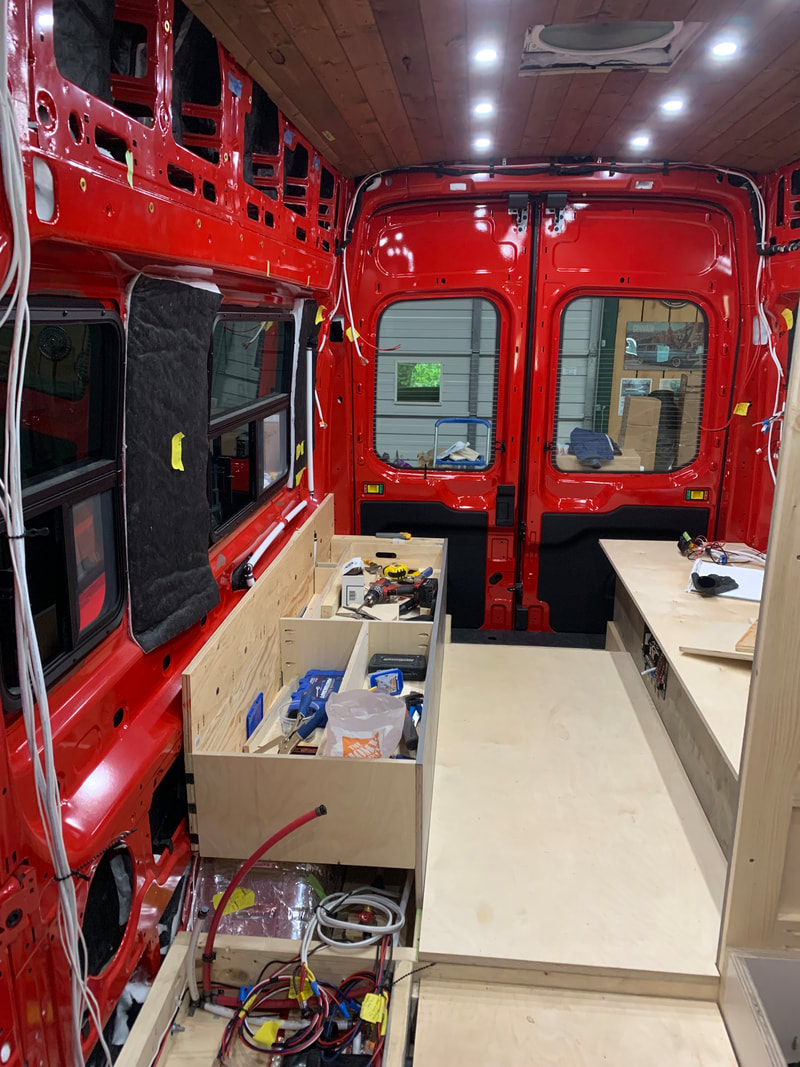
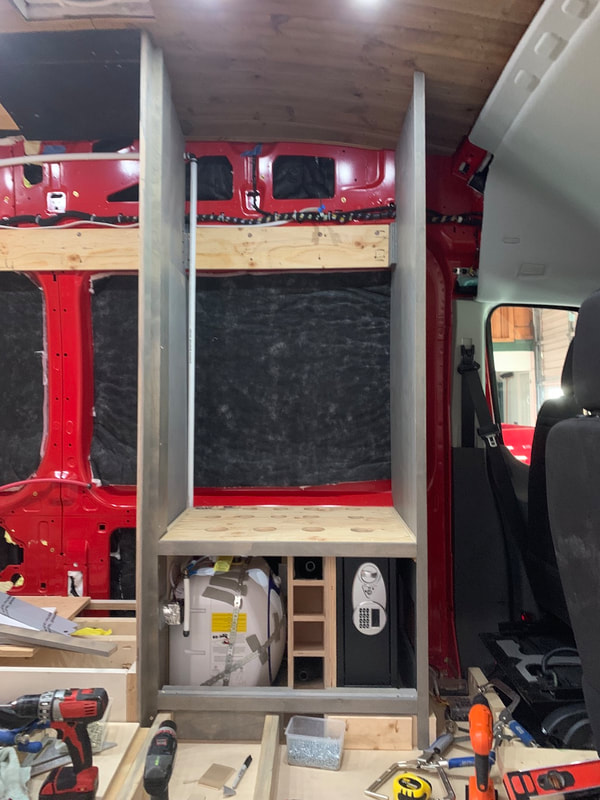
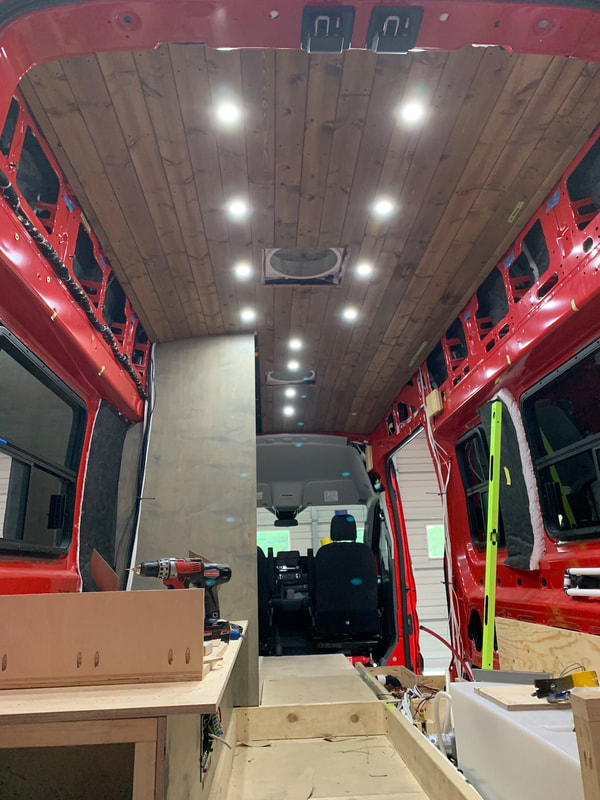
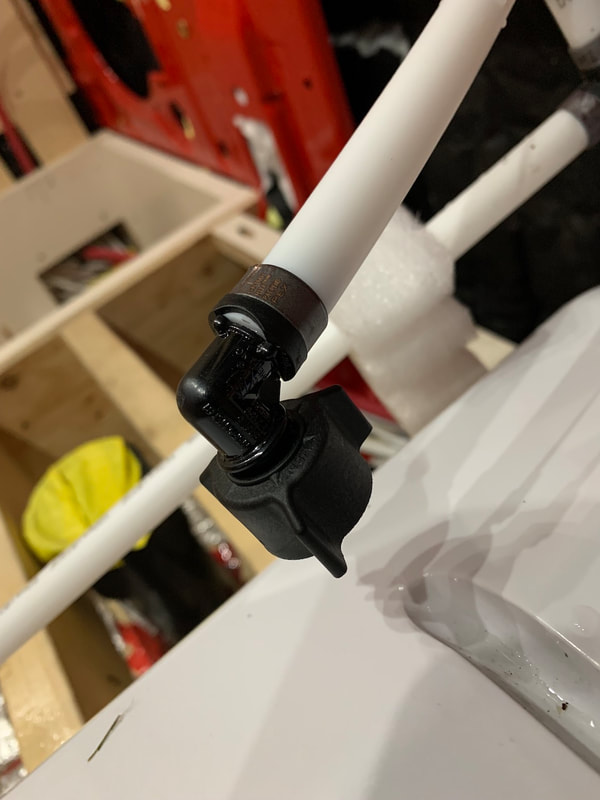
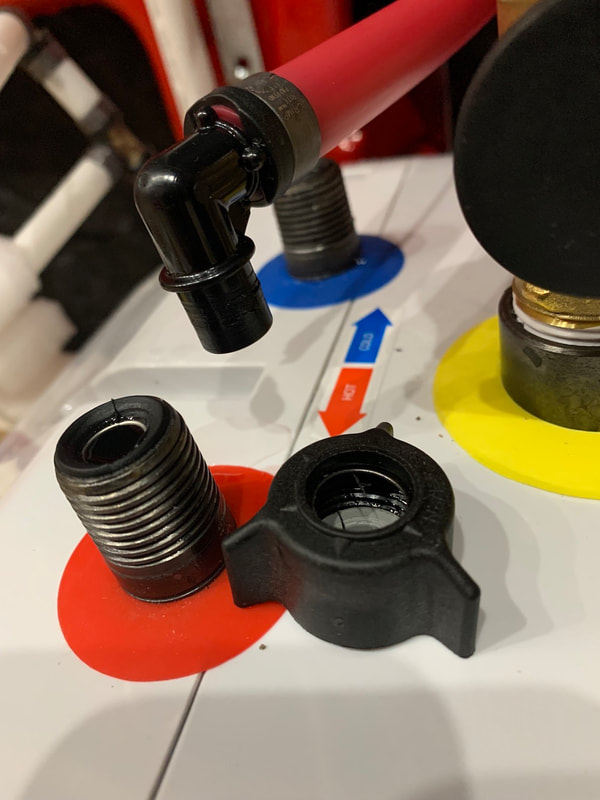
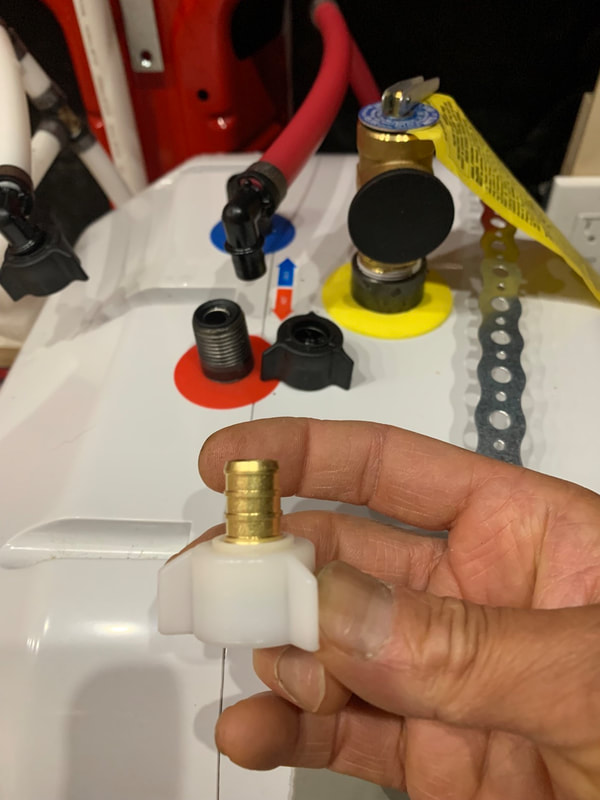
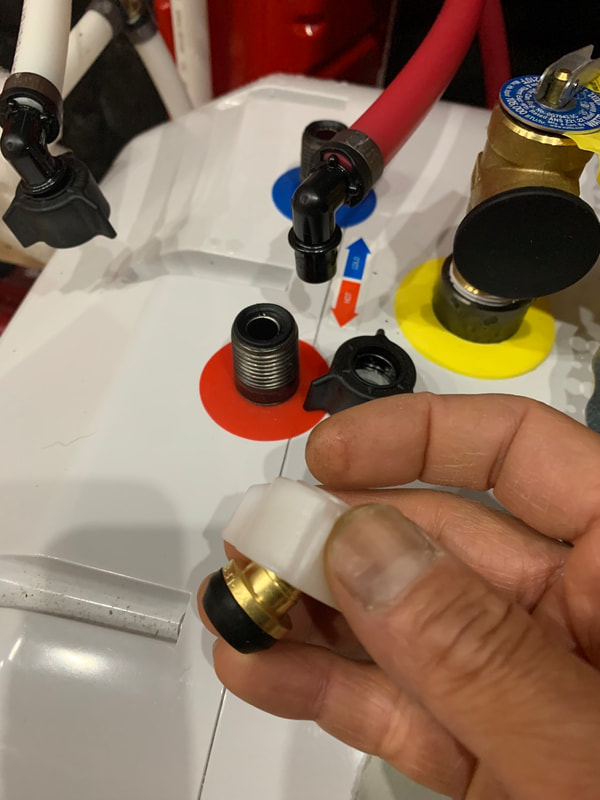
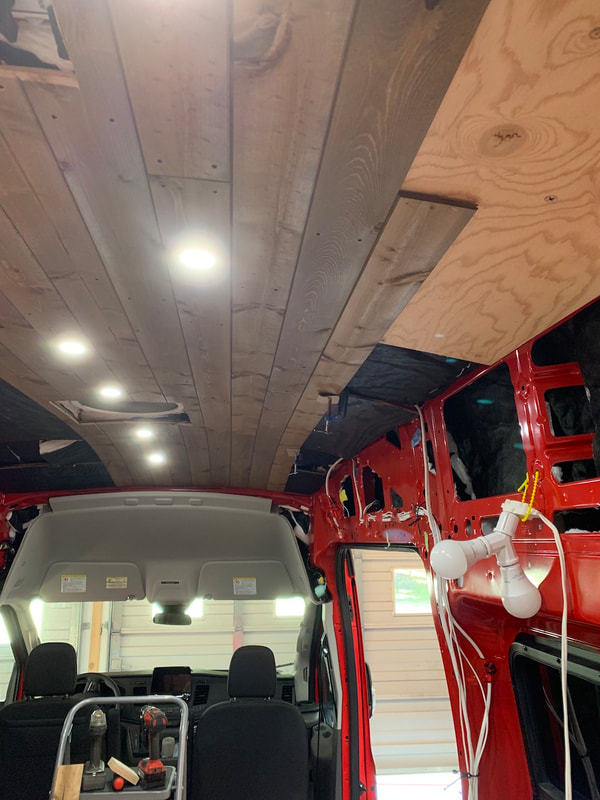
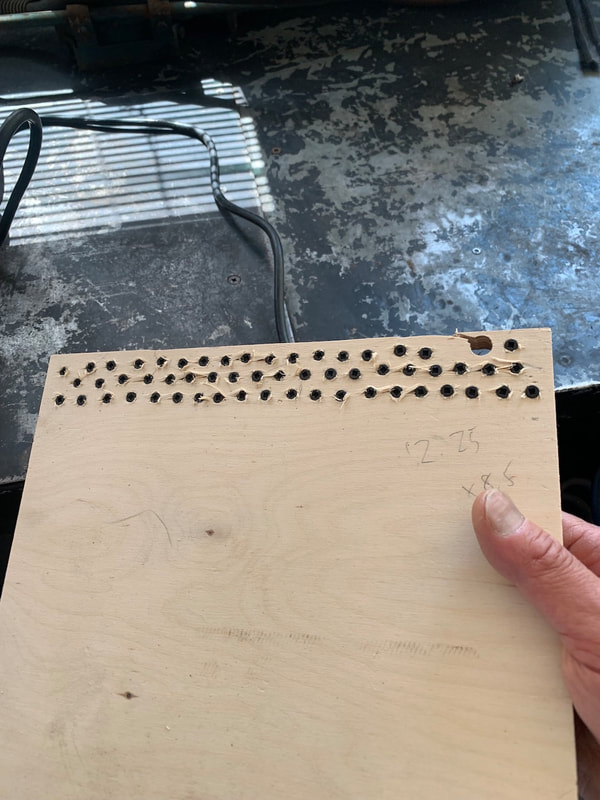
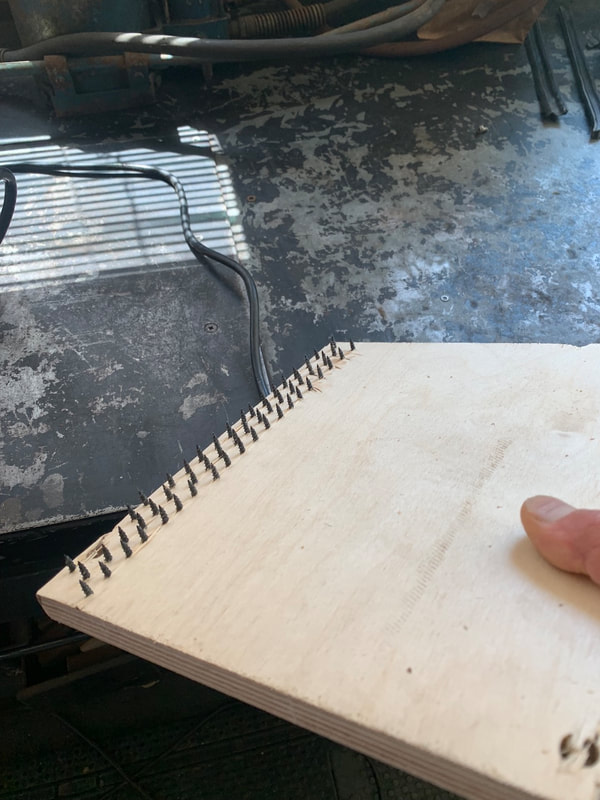
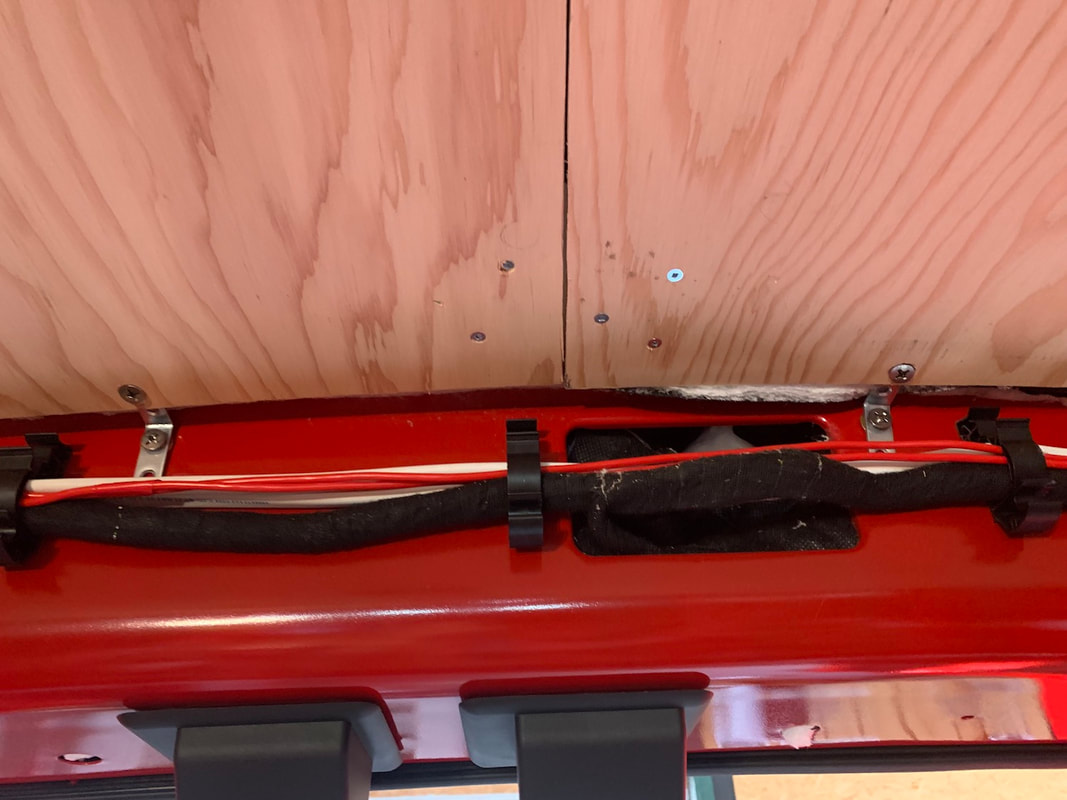
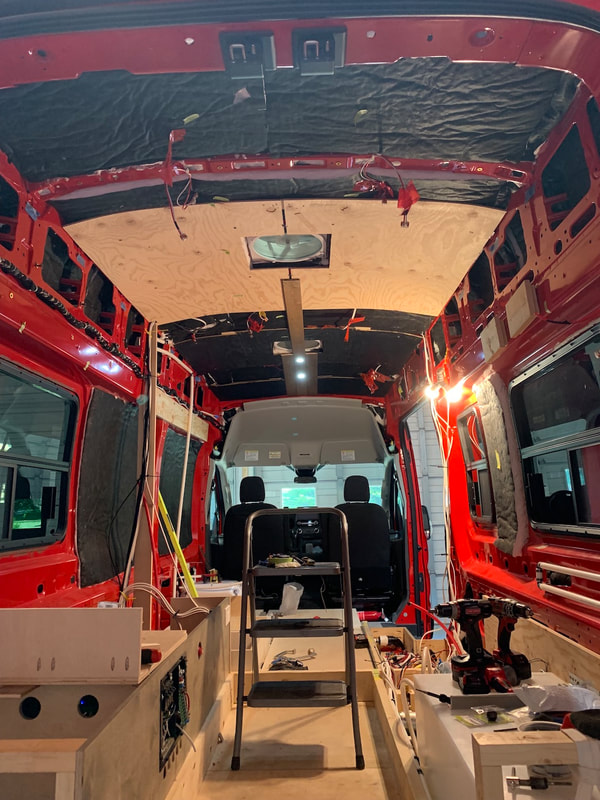
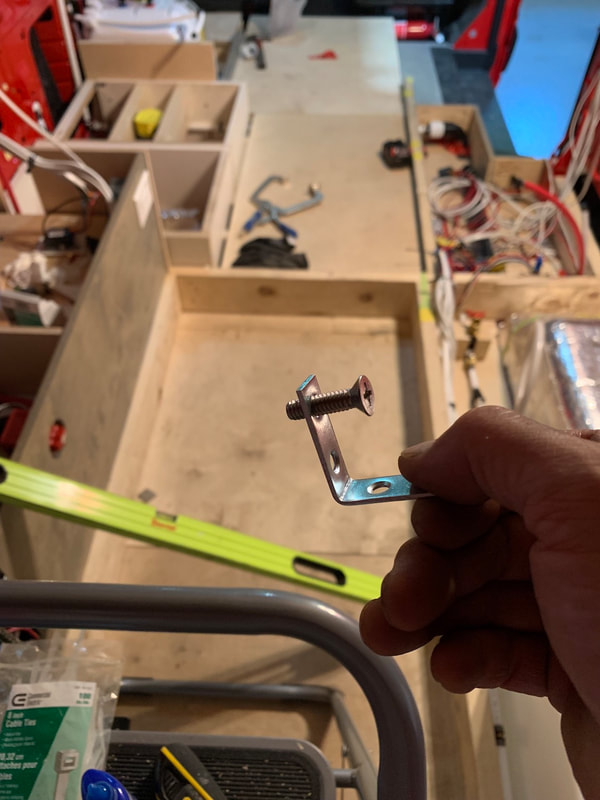
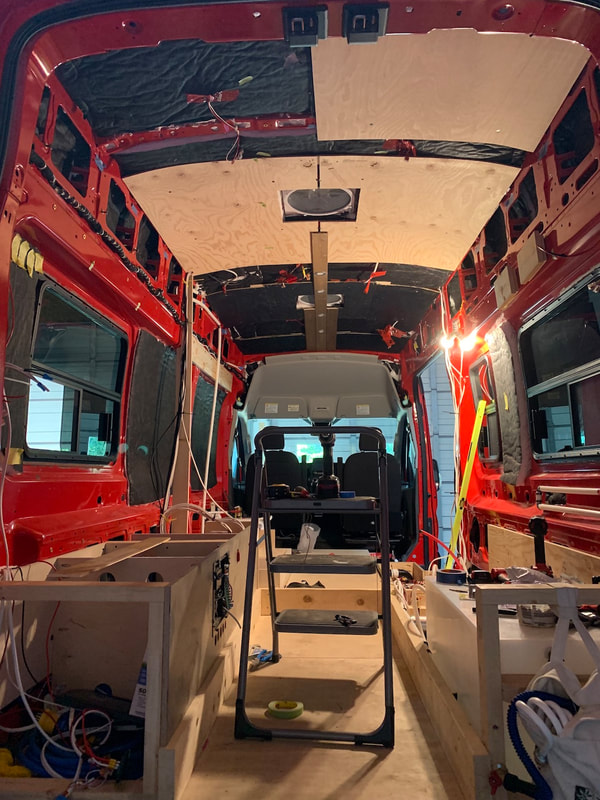
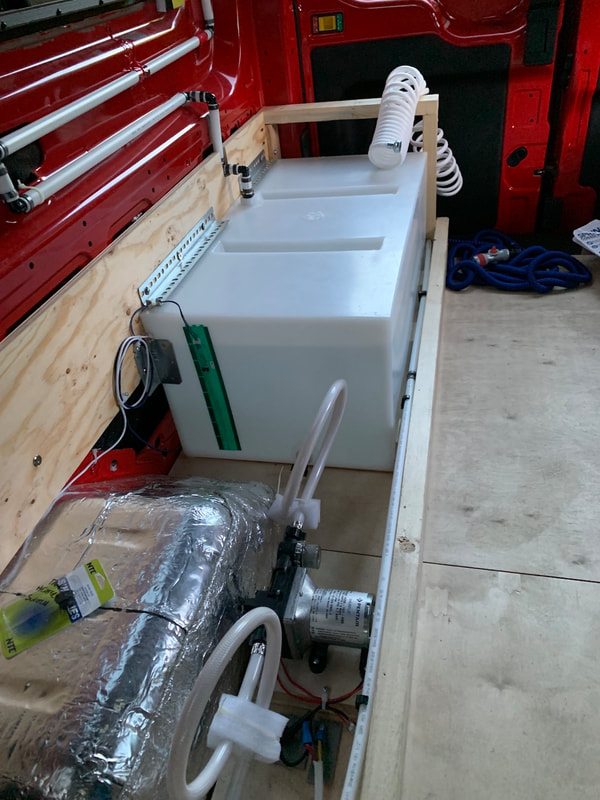
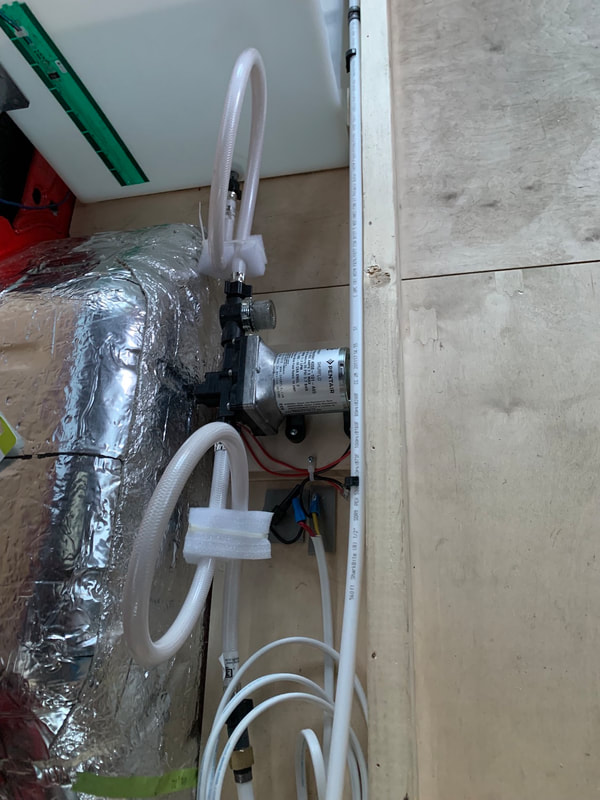
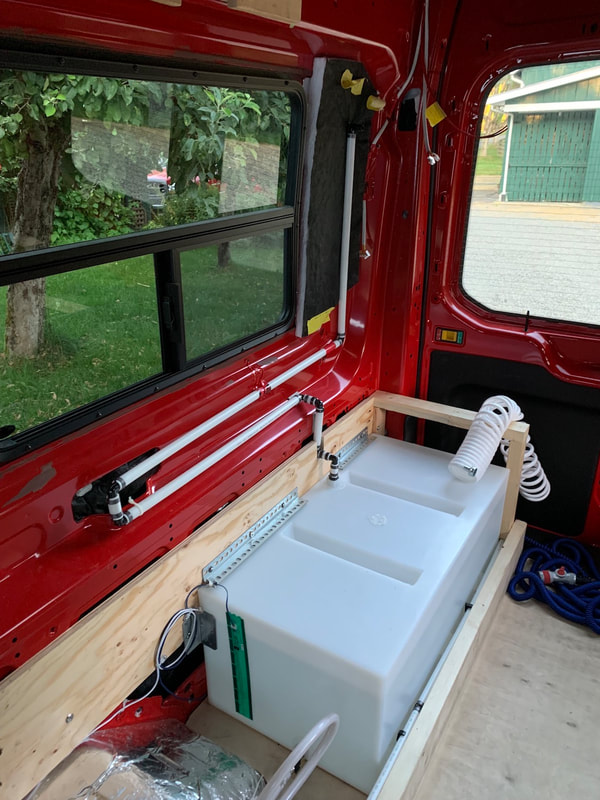
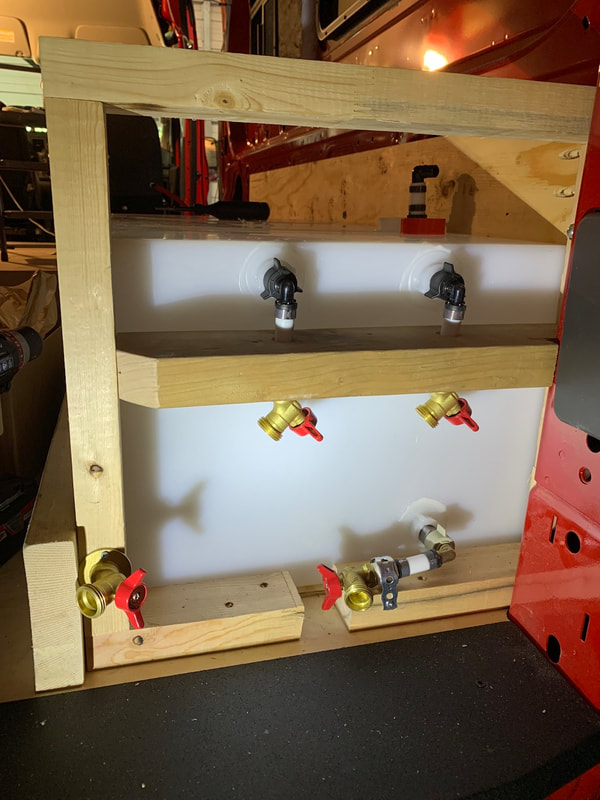
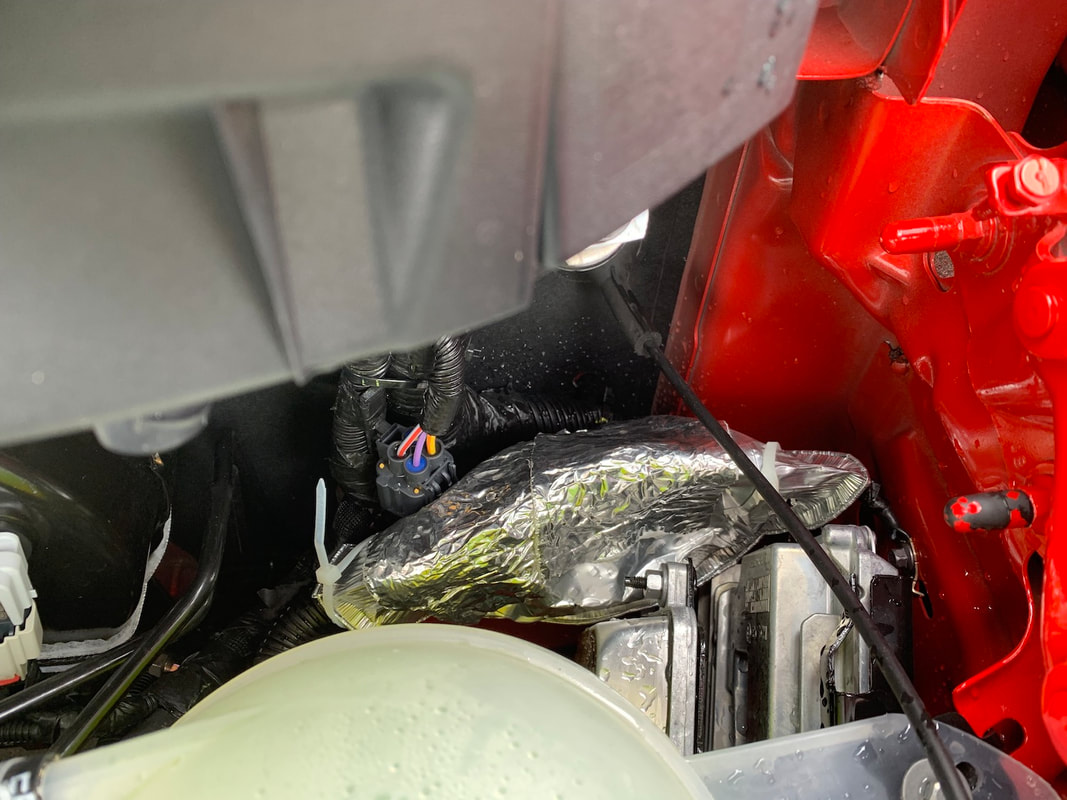
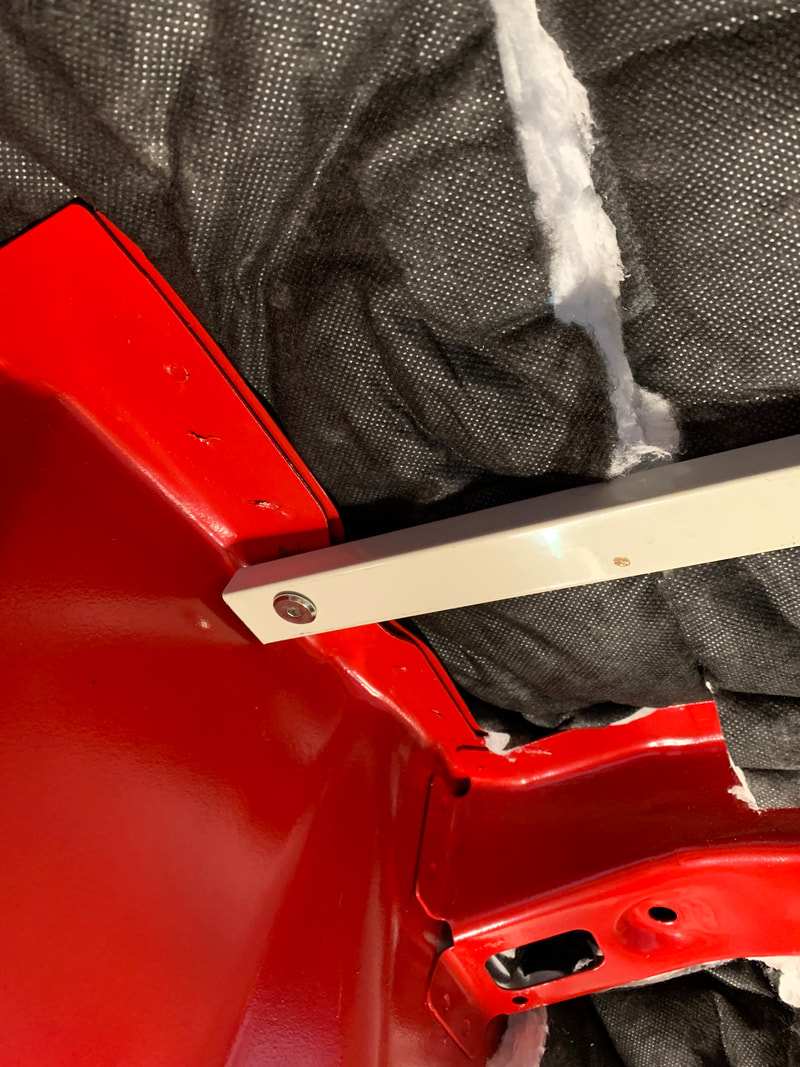
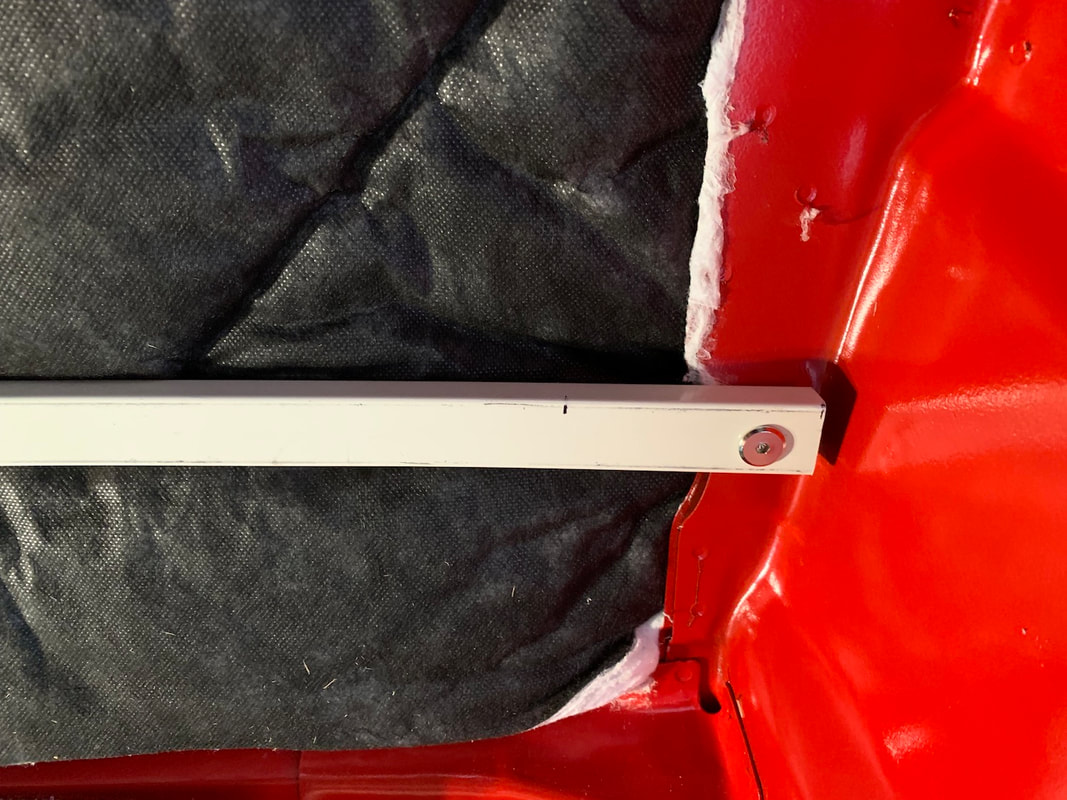
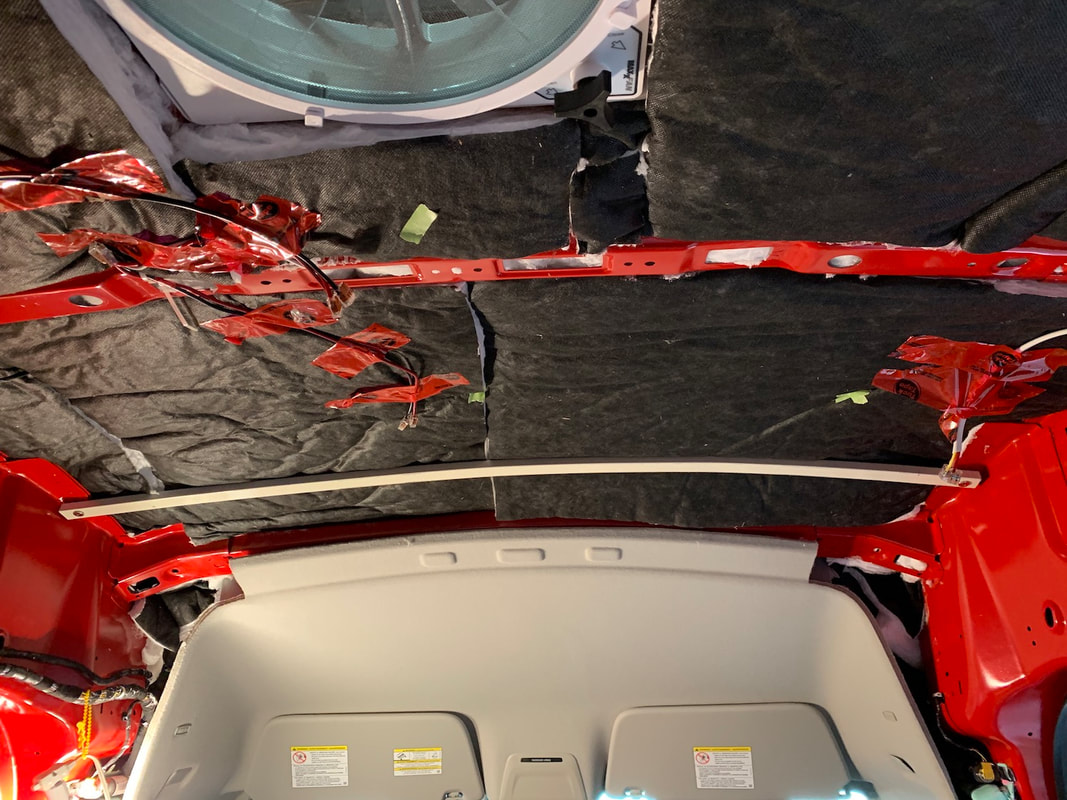
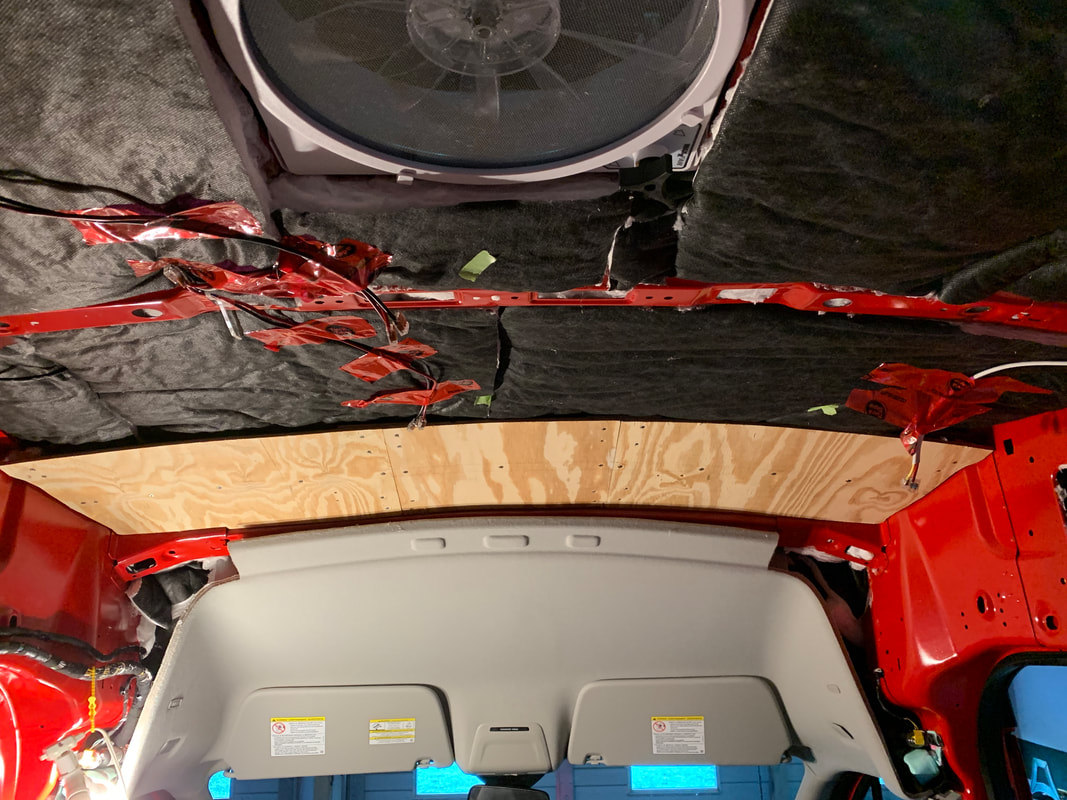
The cabinet for the fridge and microwave is very complex. Lots of things going on in terms of what goes into the cabinet, install dimensions and trim pieces, items under the fridge, ventilation, etc. All of these aspects have an affect on the cabinet design and construction. Most of them I've been able to keep on top of but there have been a few times I got to a stage and thought, for example, "Hmmm... I didn't anticipate that problem. How am I going to get those pocket screws into that face rail when there's no room in behind for me to get a drill or screw driver in there?" Thankfully I've been able to problem solve each of the difficulties encountered and thus far things have gone well. I was going to install the fridge and then work on the upper cabinet for the microwave/convection oven but decided it would be better to complete the entire cabinet and then install the fridge. I do not want to damage or ding the fridge while trying to work around it. I'll just have to be really careful with the instal dimensions on the cavity. Tackling an aspect of cabinet construction that is new to me was interesting. I've never installed cabinet doors and hinges before. Before proceeding with the cabinet I had to make some mini mockups of doors and hinges to check out the door overlaps on the face rail to see how they would align with the fridge trim. I hope I got it right! The Kreg cabinet hinge kit is amazing. It makes it really easy to consistently and accurately drill the holes (and mounting screws) for the hinges. My only long term niggle is about access to the water heater. One day it will need a repair or replacement. In order to do that the fridge and shelf will have to come out. Not a super difficult task but I'm already not looking forward to it! The main part of the ceiling is finished:) Only the section in the bathroom and refrigerator area still to do. In the process of doing this I getting ready to make a template for the section of wall between the bathroom and the refrigerator. I noticed that the plastic 90° female threaded elbows looked a bit weird. One of the elbows was protruding out of the plastic collar ring further than the other elbow and they were both a bit on an angle coming out of the collars. Long story short - the elbow came right out of the collar and water sprayed to the ceiling! Good thing I was prepared and set up to test it just in case it did this so there was a very small amount of water that came out. Thank goodness that didn't happen after I had built the cabinets and we were out camping! In any event, disaster avoided and I know how to easily fix the problem - but I can't believe how stupid the design is on those threaded elbows. We're very happy with how the ceiling looks! The work on the ceiling tongue and groove continued today. I realized that small C clamps make the work much easier. I use them to loosely clamp each plank in place. Then I tighten each clamp until I get the plank to the correct bend to match the adjacent plank that is already screwed into the ceiling. Then it's much easier to use a block and hammer to tap the tongue into the groove. once I get it there, then I tighten each clamp and then screw the plank in place. I also stained and put Varathane onto the 5/8" Baltic birch plywood panel that closes in the rear side of the washroom. A few more screws tomorrow will finish the installation of that panel. After that I can continue with the T&G on the ceiling and the four LED lights on the driver's side aft of the washroom. After more consideration, I decided to modify the trim screws for the ceiling. I really didn't like the idea of piercing a wire with a screw when attaching the tongue and groove to the backing plywood. The mod wasn't really hard to do although it did take over an hour to complete. I screwed a pile of 1" #6 trim screws into a scrap piece of 5/8 baltic birch plywood until the head was flush with the surface. Then I used an angle grinder with a metal cutting disc to shear off the ends of the screws. I touched up the ends with a grinding disc in an angle grinder and then removed the screws from the wood. Now I had a bunch of 5/8" long trim screws. I know what you're thinking - "How are those going to go into wood with a flattened tip?!" My plan was to drill an appropriately size hole (3/32") and counter sink for the screw head. Because of the pre-drilling and counter sinking, my hope was that the threads would still bite and allow me to secure the tongue and groove to the plywood. It worked! :) I replaced almost all of the screws I had used yesterday with the modified screws and continued with installation. In the front of the van where there is a large curvature and either some space behind the tongue and groove or some thicker attachment points I left the full length 1" screws in place. Also there is not much wiring at the front to be concerned about. Installation of the ceiling support panels is complete. I started installing the tongue and groove slats and ceiling lots as well. It was a bit tricky working around the shape of the van roof. Using the Cross-nuts (a.k.a. Plusnuts) worked well for securing the marine fir plywood panels. The panels have an inherent flex to them which made them much easier to install. Rather than try to fight with a single piece spanning the entire roof east-west, I used either 2 or 3 pieces (the three was because I was trying to use up some of the plywood that was used to ship the fridge.) Some modifications on 1" L brackets was also needed. I used a tap and die set to thread a hole on each bracket to 1/4" 20 t.p.i. so that I could use the same bolts to screw into the brackets and Cross-nuts. On the other side of the bracket a hole was enlarged so that I could use the same nuts to secure the brackets to the Cross-nuts I installed in various locations of the van. Most of the Cross-nuts went into the roof ribs but at the back part of the van there is no cross rib to attach to. In that location I installed Cross-nuts into the side and end walls so the modified L brackets could act as anchor points for the bolts. To install the tongue and groove slats I'm using 1" long #6 black trim screws. I wish they had come in a shorter length (1/2" would have been ideal) but they'll have to do and I'll have to be careful with wire locations and screwing (both the plywood backing and TG slats are 1/4" for 1/2" total thickness.) The "final" tweaks to the water supply system were finished today. After checking the connections for moisture, I found the same spot had a tiny bit of weeping (less than a drop of water was present.) This was after I had installed shut off valves in the system on either side of the pump anti-vibration hoses. What I realized was that I had a brass male fitting going into the plastic connection of the vibration dampening hose. This is the third time now when I had metal connected to plastic and it didn't seal properly (even with teflon tape.) So my recommendation is to always go plastic to plastic and metal to metal. If you have a mix in your system that's okay but do the transitions via PEX. So today I removed two pieces replacing that with one plastic male connector to the hose and it all worked out better in the end anyways - I'm happy! Finishing up the last of the utilities supplies. The supply side of the water system was installed today. Plumbing is very challenging as there are all sorts of different standards for thread, tapered, non-tapered, pipe types, etc. If you're working with a poly tank, be careful not to force any metal parts in that might ruin your threads! I couldn't get the metal spigots to go in cleanly so I decided to use plastic fittings into the tank and then PEX out from the plastic. We ran the first test filling the fresh water tank and running the pump to pressurize the system. No leaks on that side as far as I can tell. Oddly, while I was filling the tank my father-in-law who was checking things out under the passenger side and said, "What's this water?" I looked and replied, "You're joking, right?" Yes he was - phew! But then he went and look under the driver side and said he saw a drip. I checked that out and sure enough, there was a drip. We both went inside and couldn't find the source. I slid under Redford and saw a drip coming off the end of the muffler. I checked around a bunch more inside and still couldn't find anything. I figure maybe it was either residual water from my testing the other day or sometimes you see water dripping out of the tail pipe of a car... I had started the engine a few times driving out of the work bay, to the water source, and around the yard a bit. I left the system pressurized overnight and the van is outside so I'll see what things look like tomorrow. We haven't had rain for over 35 days! Nothing but a heat wave. After revising the vent system for the black and grey tanks I really needed to know if there were any leaks in the roof before starting an installation of the ceiling. Ideally this would meant leaving Redford out in a lot of rain and also going for a drive on the freeway in some heavy rain. You never know where water can sneak in. Go figure that we would be having a record heat and dry period. I did discover a leak in the vent system - I thought the way the external cover gather air and water that it would be funnelled into the vent tube - nope! There was a drip. I removed the ABS pipe going into the stack and used SikaFlex to seal the stack to the vent cover. After water testing as best I could with a hose everything seems fine. (I put toilet paper onto the screws and other pipes penetrating the ceiling to collect moisture - no evidence of any water entry:) However, what I did find was that all the water running down the front of the van ran into the rain gutter below the windshield and funnelled all of the water directly onto the wiring harness inside the engine compartment! The gutter was also very loose and came off. I installed an aluminum pie plate folded in half and covered with some heater duct insulation over the harness. Its zip tied in place. The idea is the shield the harness from the water flow while still allowing air flow over the harness. Hopefully it works! I also drilled hole high up on the loose rain gutter and zip tied that to a wire harness to keep it from falling off the gutter system. The first couple of ceiling tests were unsuccessful. The plywood that was flexible enough to conform to the shape of the front compound curved section was not self-supporting A single piece of 1/8" steel strapping was also not strong enough to support itself (let alone the mass of the wood as well.) The best solution was that I found a piece of rectangular channel aluminum in "inventory" (probably from some old door/window system.) I curved that by rolling it over a large roller (for a table saw to support long pieces of wood coming off the table) until I got a shape I was happy with. I did have to enlarge and align the holes in the roof metal extensions so that I could bolt the aluminum channel in place. I used self-tapping 1" flat head screws to install the pieces of wood across the front ceiling area. This will give me something to screw into when I install the finished tongue and groove 1/4" pine as the final ceiling. Trying to find the right screws to install the tongue and groove planks into the plywood as not been easy. We want something that is 1" long, has a small head, and is the "right colour." Unfortunately, the local Home Depot and Canadian Tire did not have anything suitable. Amazon.ca didn't have what I wanted either. I ended up ordering from Amazon.com and got some 1" black trim screws with small head. Hopefully it won't look too busy. I really didn't think it was going to be such an ordeal. Remember in my previous post I decided to change the air vents for the grey and black tanks and run them separately to the roof vent? Two days, four trips to Home Depot, and one trip to Andrew Sheret (plumbing supply store) later... Trying to connect systems in plumbing can be very challenging. You go to the store to be confronted by entire walls of choices that "mostly" fit together one way or another. The "funny" thing is that I spent hours working through a series of parts one step at a time. They had 1/2" flush bushings to go on the end of the pipe I had. They had 3/4" flush bushings. They had 1/2" threaded male straight to PEX. They had 3/4" threaded male straight to PEX. They had 1/2" threaded male 90° to PEX. But of course the ONE thing I needed - 3/4" threaded male 90° to PEX does not exist. The fellow at HD figured that Andrew Sheret would have it so off I drove. The counter person there said, no, actually never seen that before. Even online such a beast didn't exist. The funny thing is that when I was at HD today, another fellow was looking to connect something for his pool pump system at home and was perplexed. We looked at each other and laughed about the sea of too many choices but none really working. When I asked him what he was trying to do, I took him to the flush bushings... He was happy and got confirmation from his "pool guy" that that should work. Then he laughed and said he was sorry that he couldn't help solve my problem. Well, in the end I modified something to our unique situation with the ceiling, bathroom wall, and vents. I'll post pictures tomorrow but my test fit today seemed like everything should work better than my previous plan. The solution to my problem: just a little work with a drill press, hole saw bit, round file, table saw, ABS-PVC transition glue, PVC cement, rubber sealant,... LOL! It has turned out great though - zero clearance so no bump out needed now and the two tank vents don't merge until just a few inches from the ceiling vent exit. It took two days and some "modding" but a better end result. Yay!
|
AuthorCalvin here - after spending almost 33 years in education as a high school teacher, elementary teacher, and elementary administrator, it was time to retire! I did so happily and with no regrets; it was a terrific and fulfilling career. I do enjoy building projects as the design and building process is very therapeutic and you see a completed functional product in the end. Now to combine the build with another of Angela's and my passions - travel - is something we're really looking forward to. Archives
September 2022
Categories |


 RSS Feed
