|
It continues to be busy around the house. Our new puppy takes lots of time and support, the day-to-day household needs, and getting ready for Christmas means real-life doesn't stop for anyone! Meanwhile I continue to work here and there on Redford. There have been lots of after dinner work sessions and also those times when I go down to put a layer of Varathane onto a piece at 11:00 pm before going to bed. This save lots of time as pieces can dry and cure so they can be installed the next day.
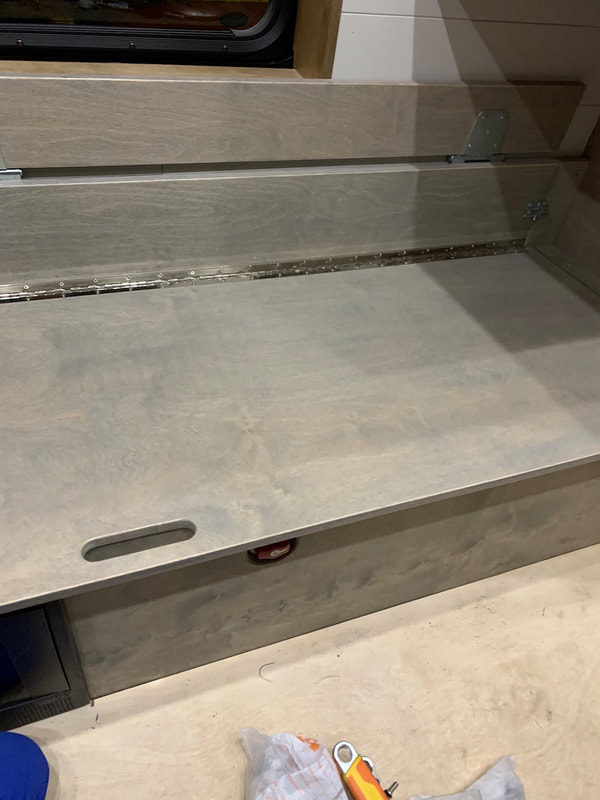
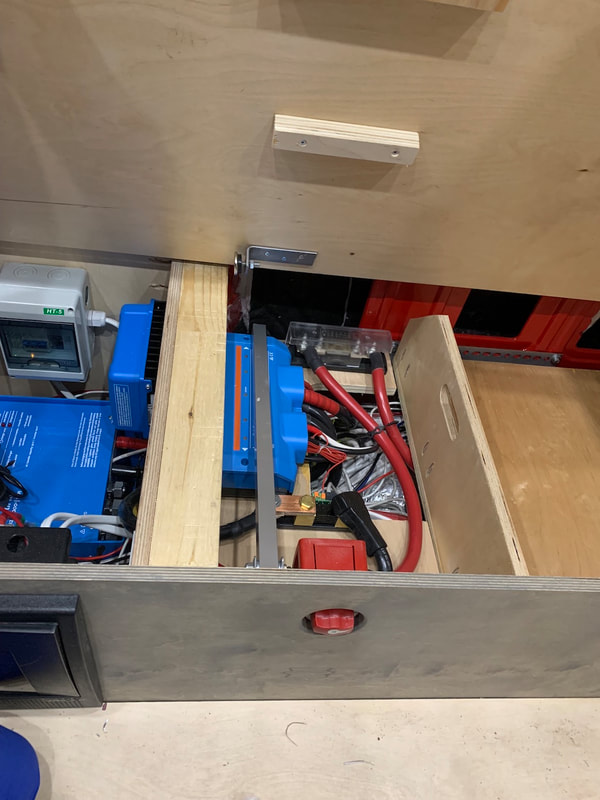
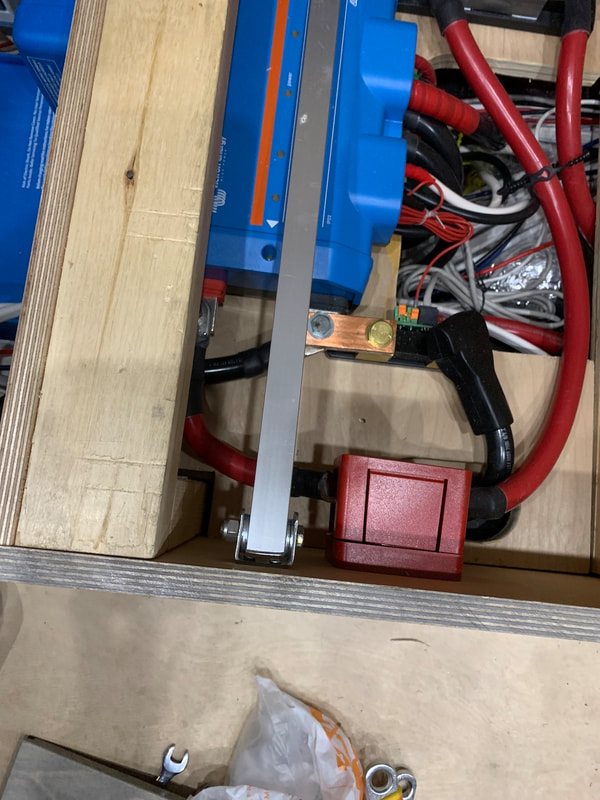
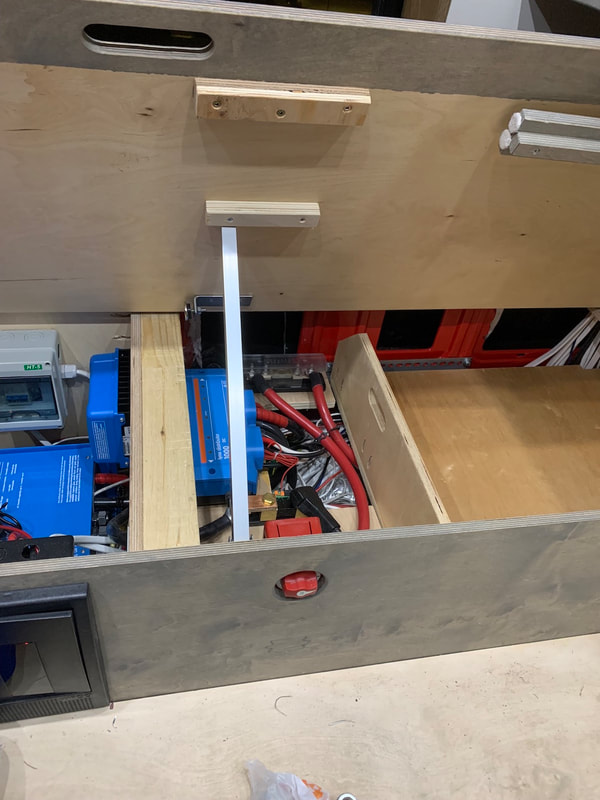
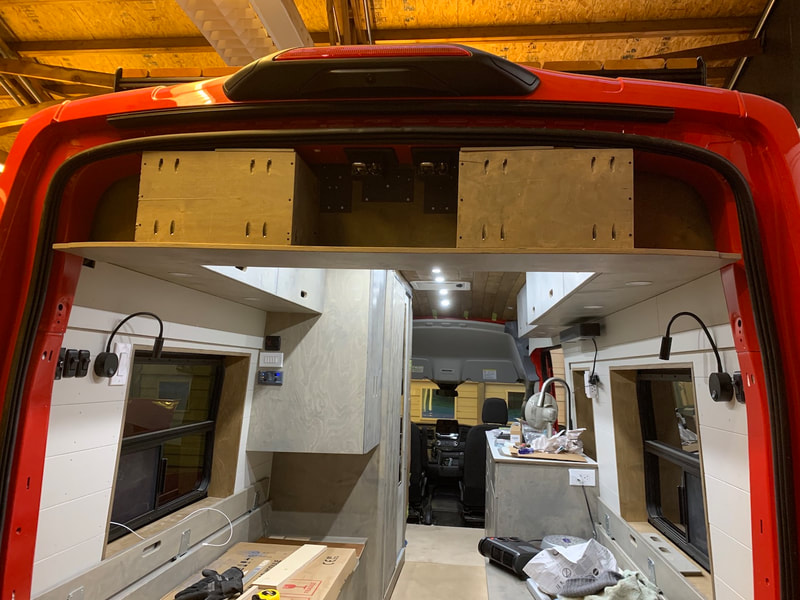
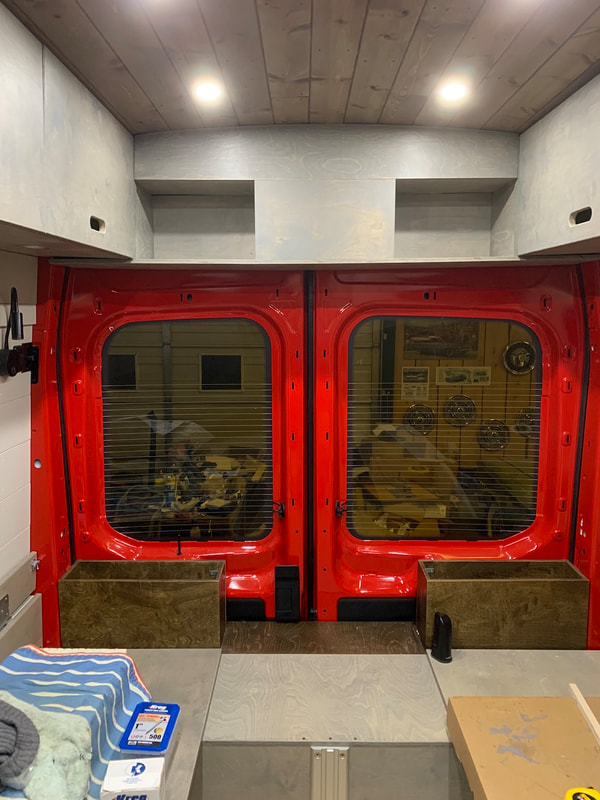
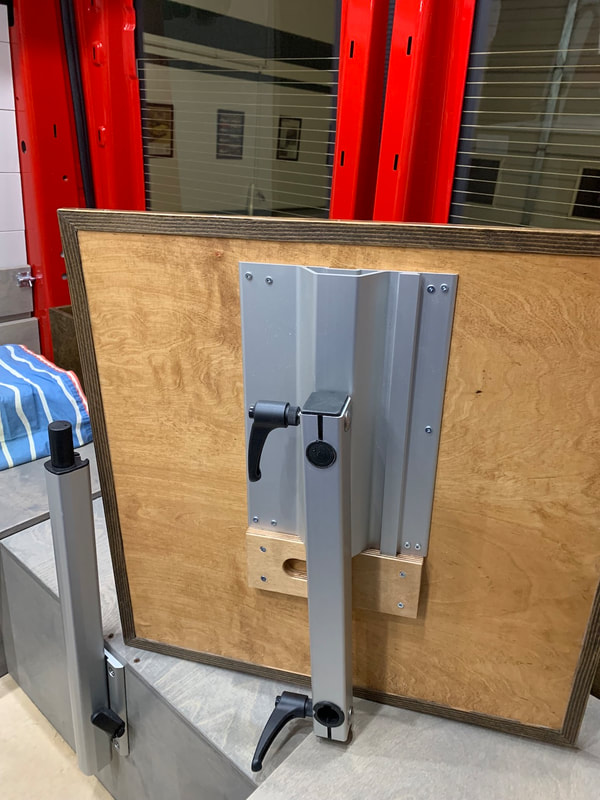
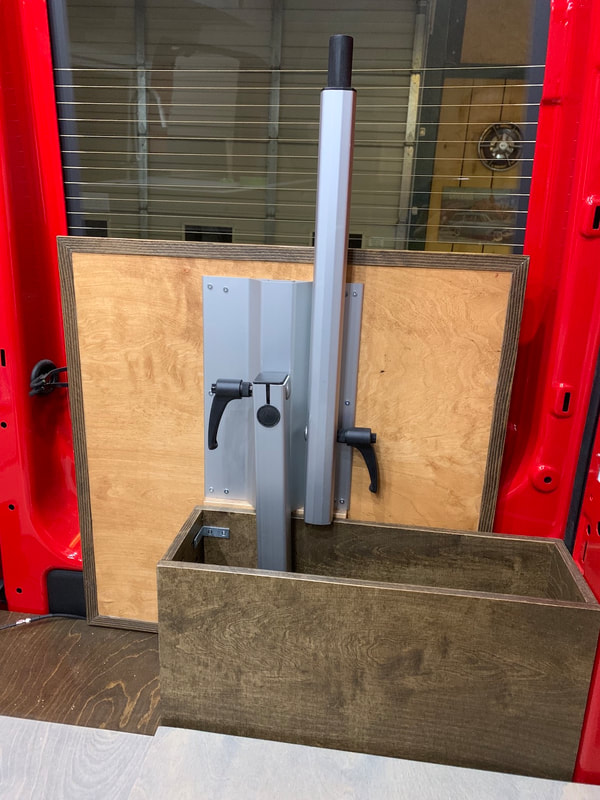
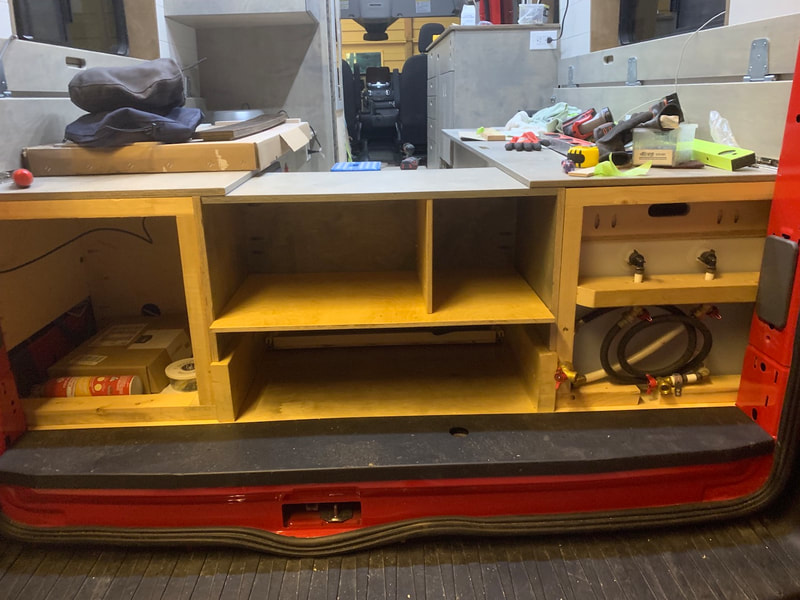
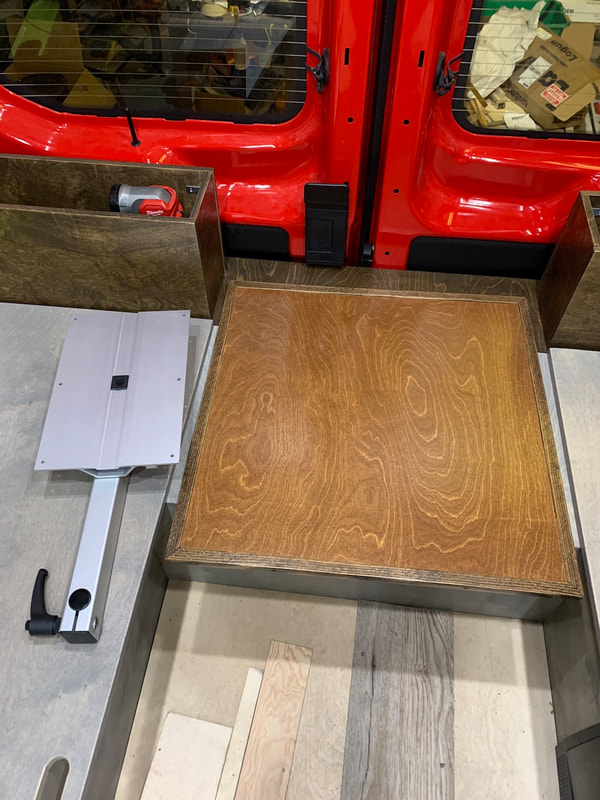
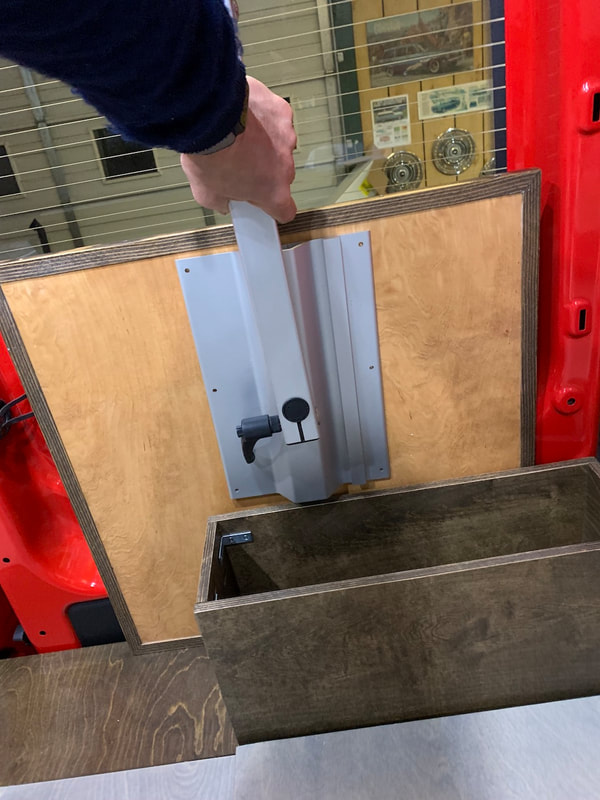
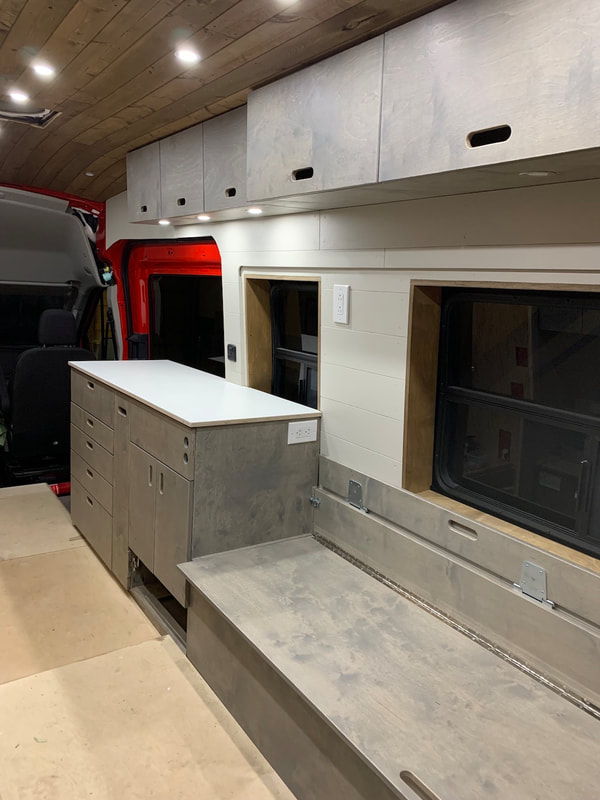
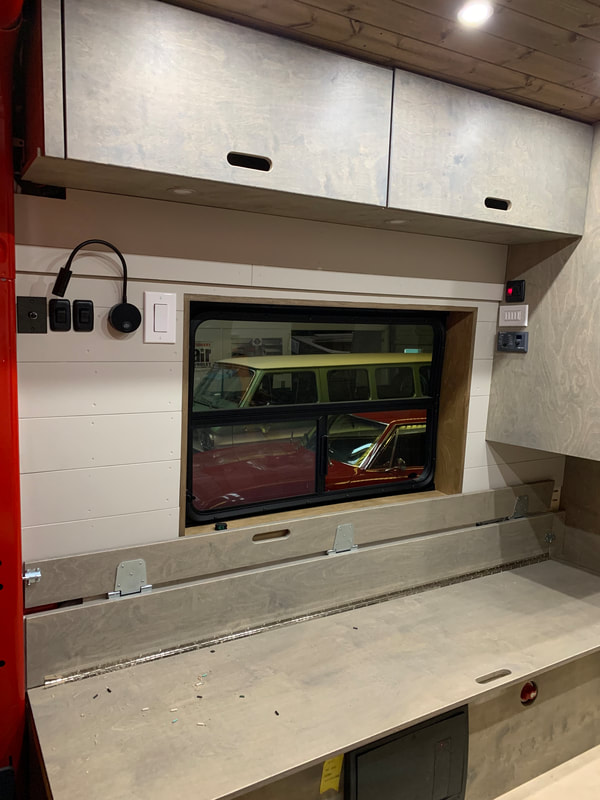
The rear shelf area has taken lots of attention and time to complete. All of the woodwork/cabinetry has been done, only the aluminum bar the goes across the front (we're still not sure if this is what we want) to keep books from flying off the shelf is still to be completed. We also came up with an idea of how to make an extended table top from our 22.5" square Lagun table for when there's 4 (or more) people in the van for eating or playing a game. It will be a 11" wide extra piece that will mount on a leg and clamp on to the side of the table. I'll post pictures of how that works when it's complete. I also got around to making the support bars that will hold the bench tops up when we want to access the storage space inside the benches. Like almost everything else, I will need to tweak (cut down) the bar lengths as I forgot to account for the fact that there will be large 5" thick cushions on top of the flaps - this will make it harder to raise the support leg into place.
0 Comments
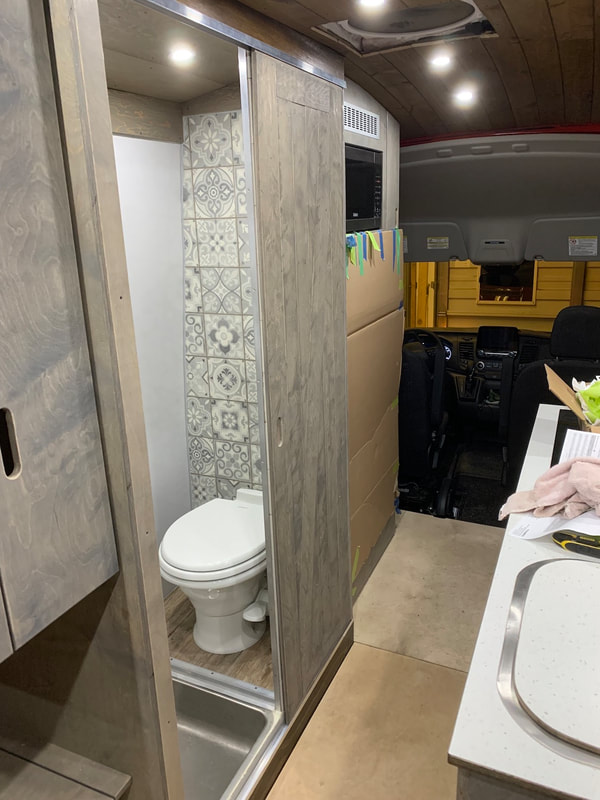
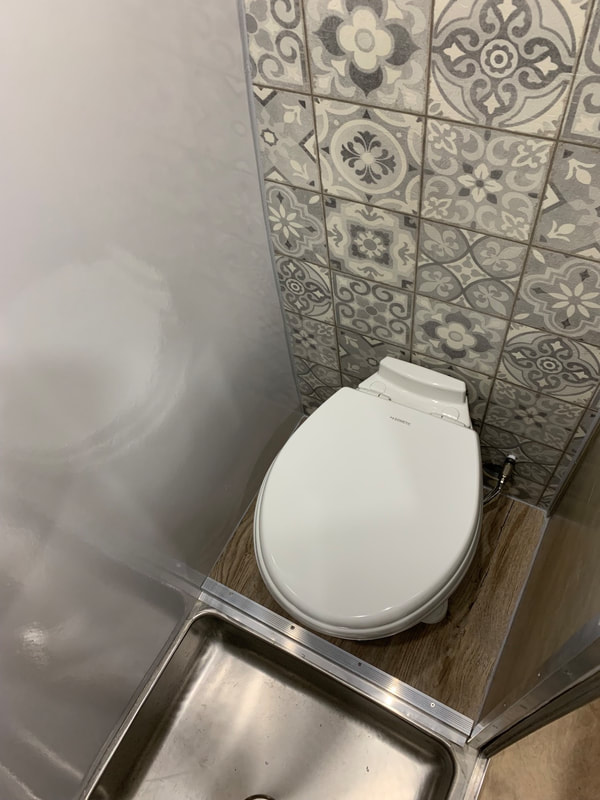
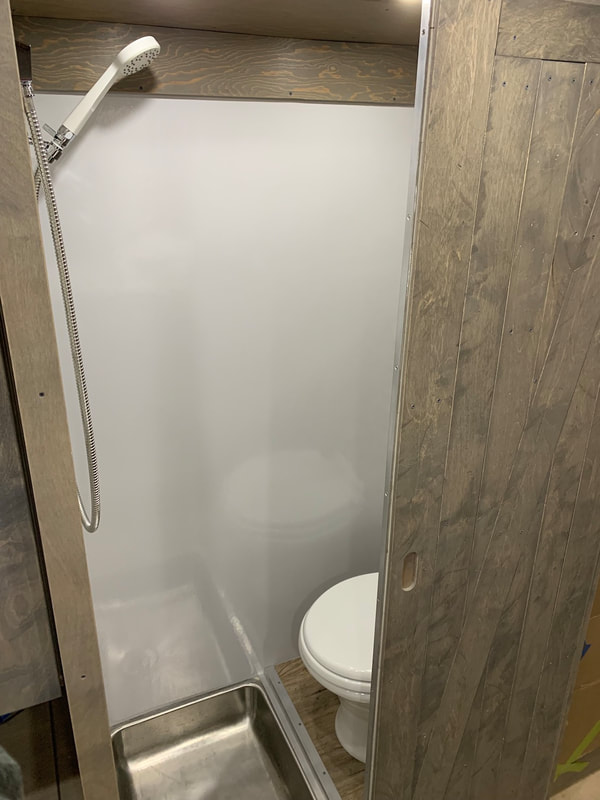
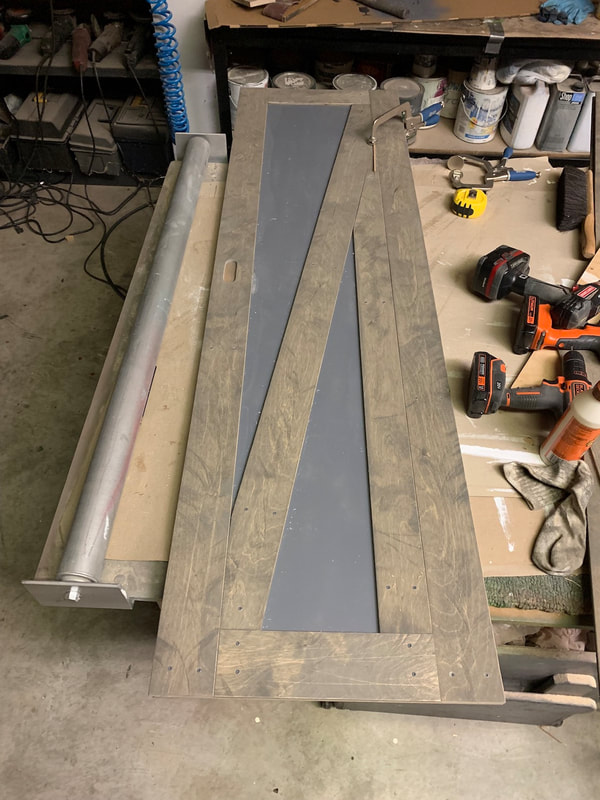
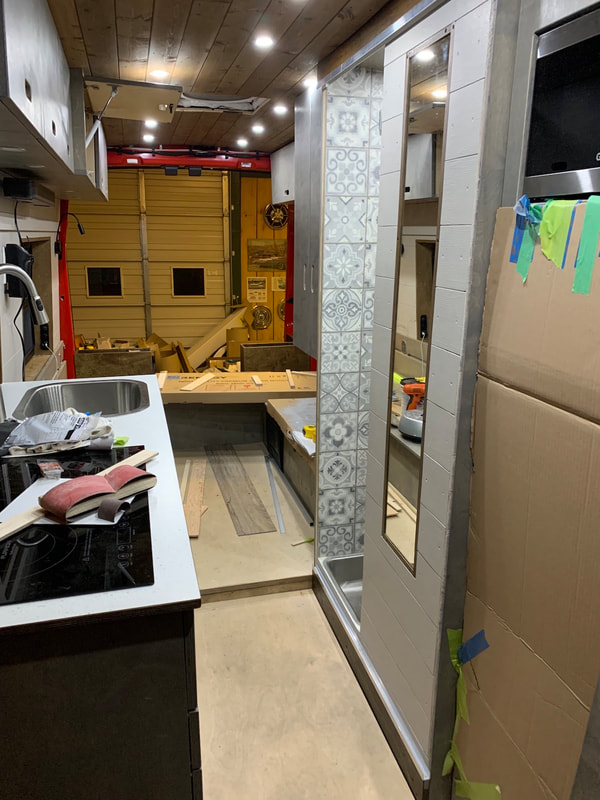
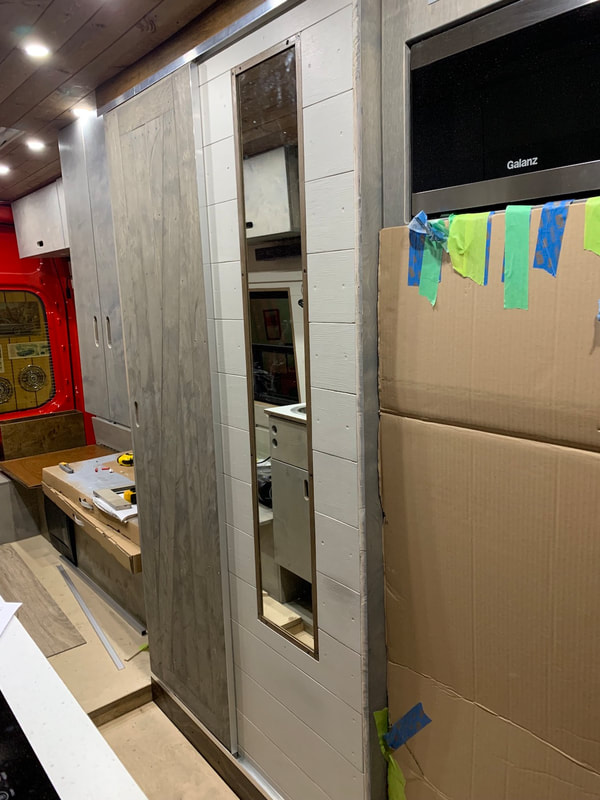
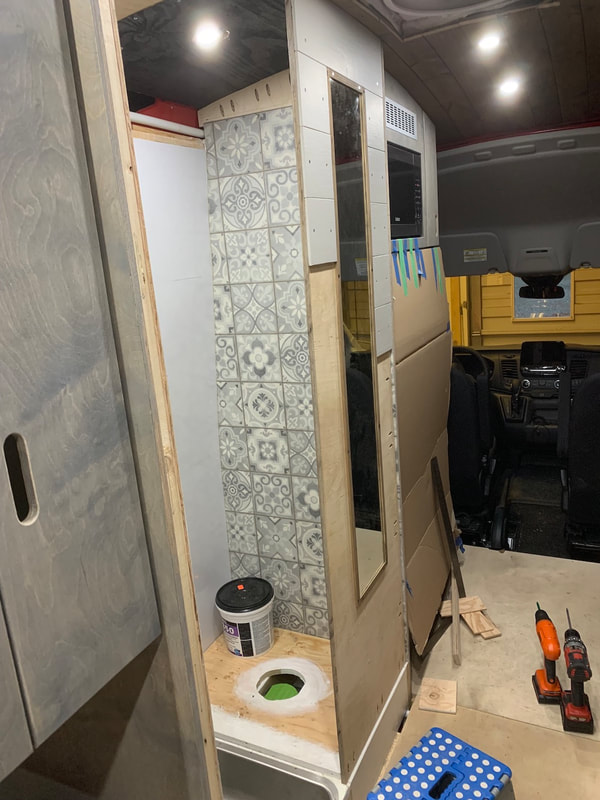
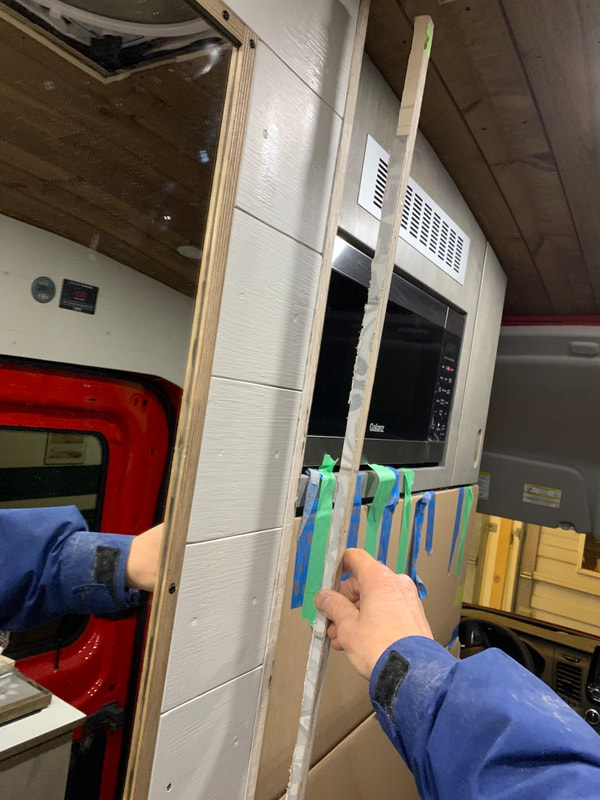
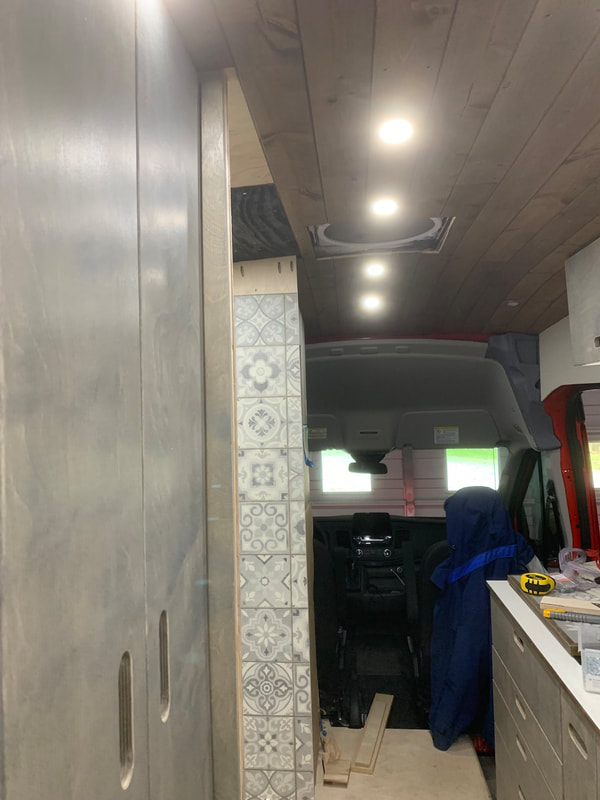
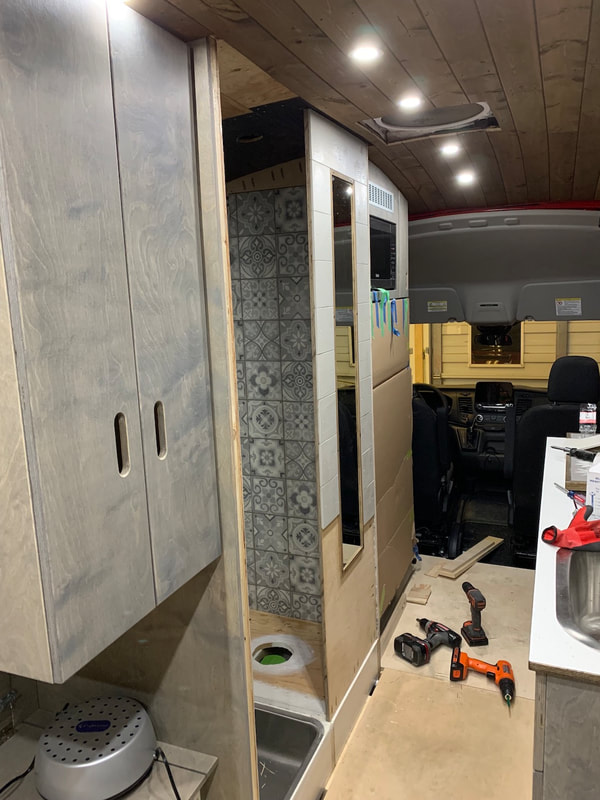
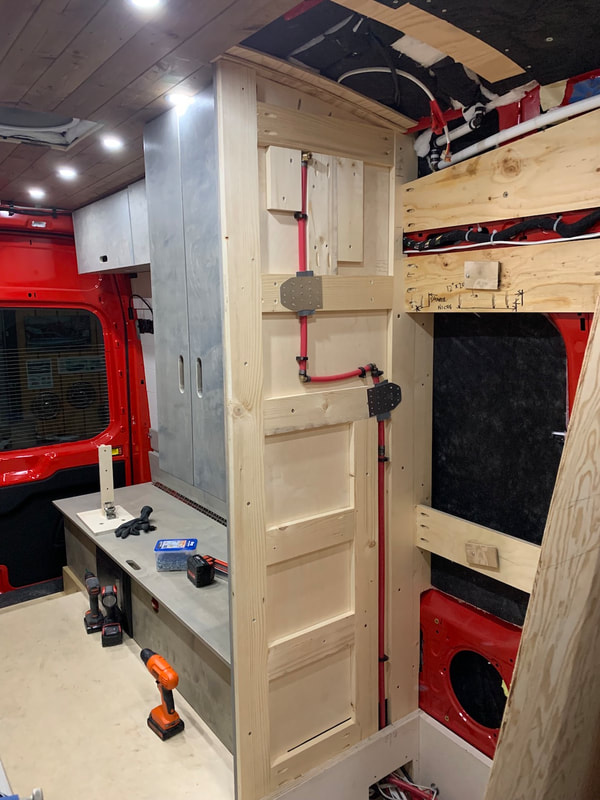
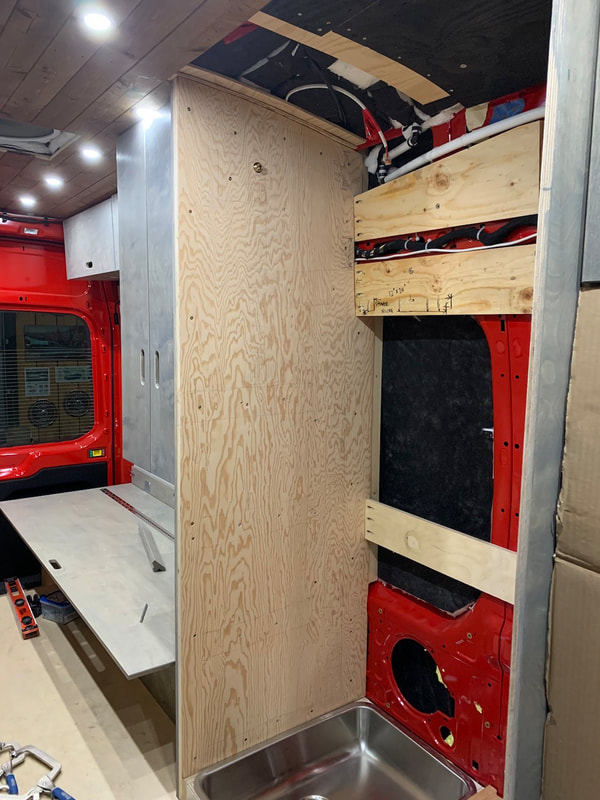
Progress on the bathroom continues (albeit slowly...) The sliding barn door was very finicky to install - it still rubs a tiny bit against the wall in behind. That serves me right for using the marine fir as the finishing boards around the mirror; the 1/4" marine fir is not a flat and uniform as the baltic birch plywood. The flexible shower curtain track has been ordered. After I installed the toilet today, I checked the shower curtain for length and I think it'll be okay, i.e., it will hang over the toilet and into the shower pan. There is also some intermittent weeping in the union between the inlet hose and the water shut off valve behind the toilet. I'll have to keep an eye on that and see if the joint settles. I continue to think about how I'm going to build the rear shelf storage area above the windows at the back of Redford. I think I have an idea that will work to give the most storage and also be "easier" to install. The vertical panel took a lot of time to make and install. A curved ceiling, and two opposite angles on the ends to fit the cabinets... Tomorrow I will continue with the build for the rest of that rear overhead storage.
It's been extremely wet around here. The third atmospheric river to be hitting our region in BC (and the Pacific Northwest of USA). Thankfully we haven't experienced any direct damage or impact in our immediate area but Abbotsford, and many other areas in BC, have been suffering a great deal.
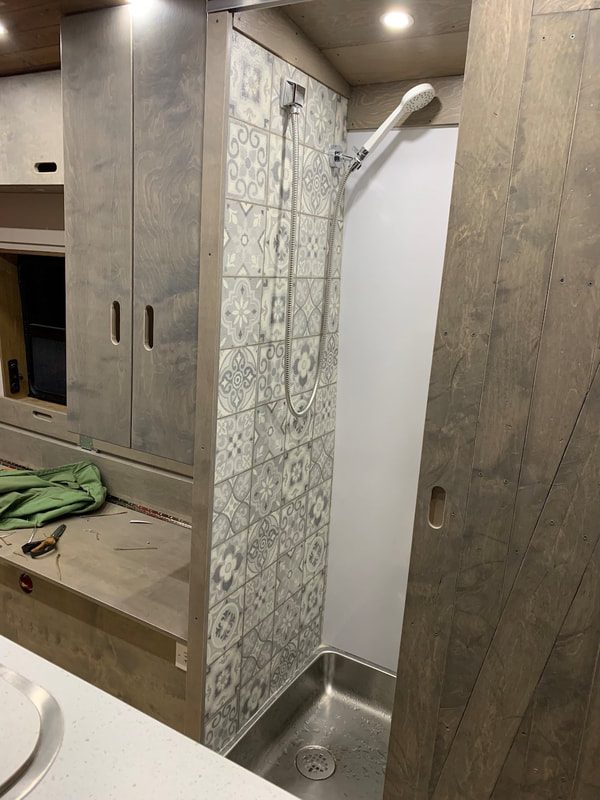
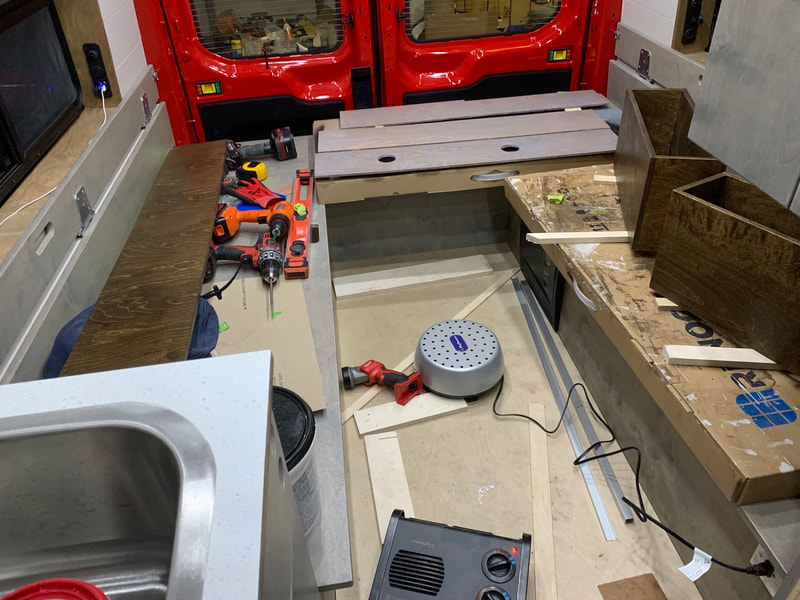
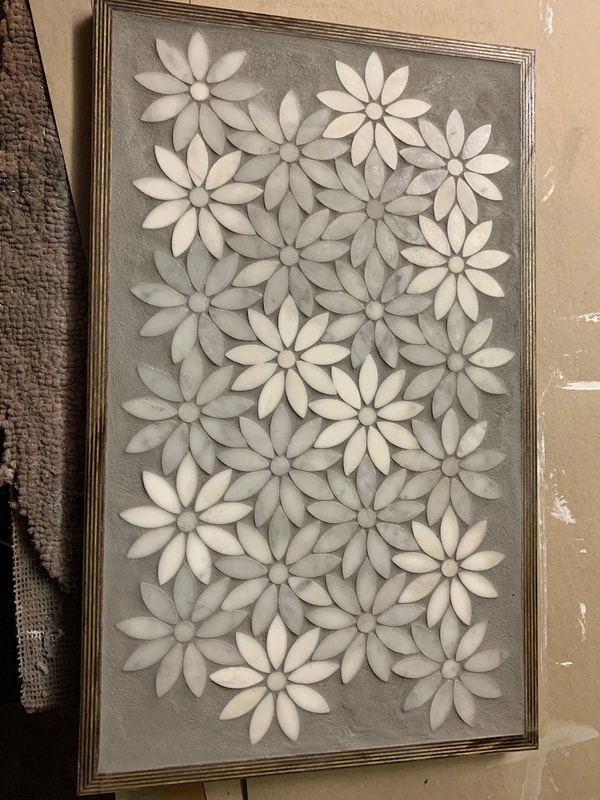
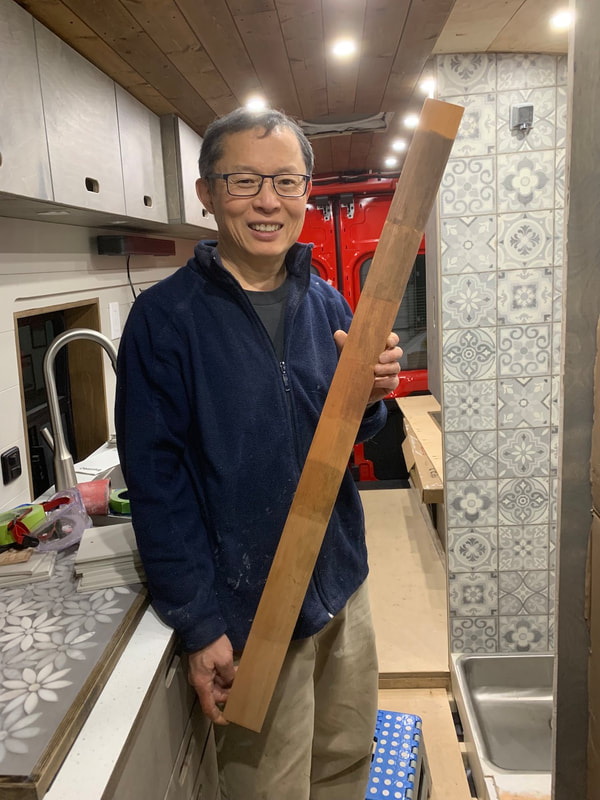
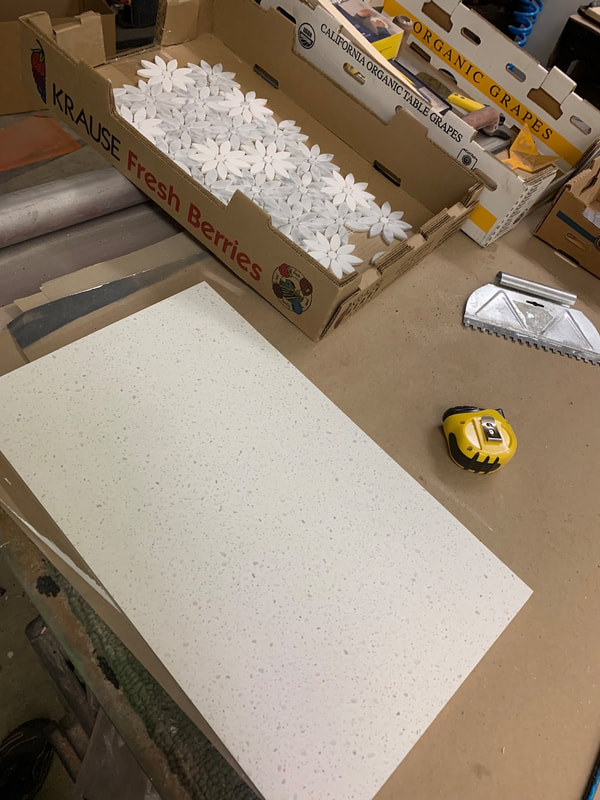
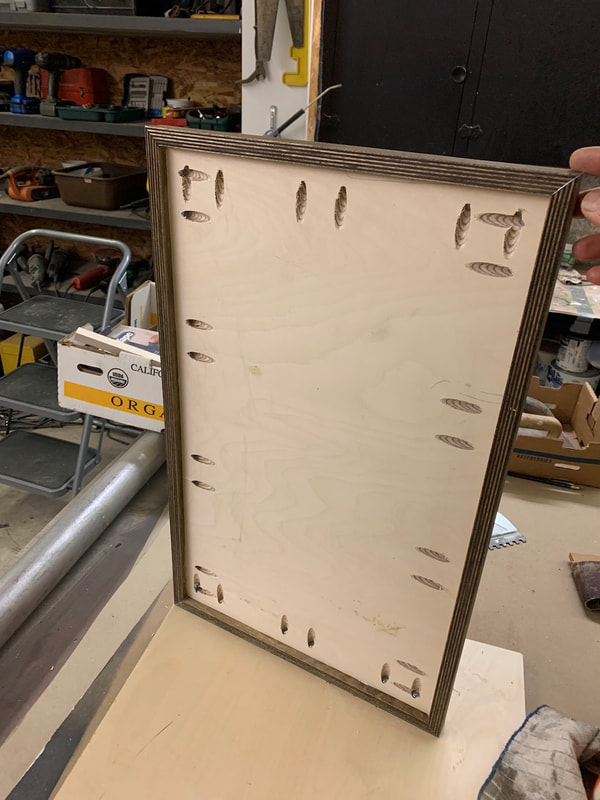
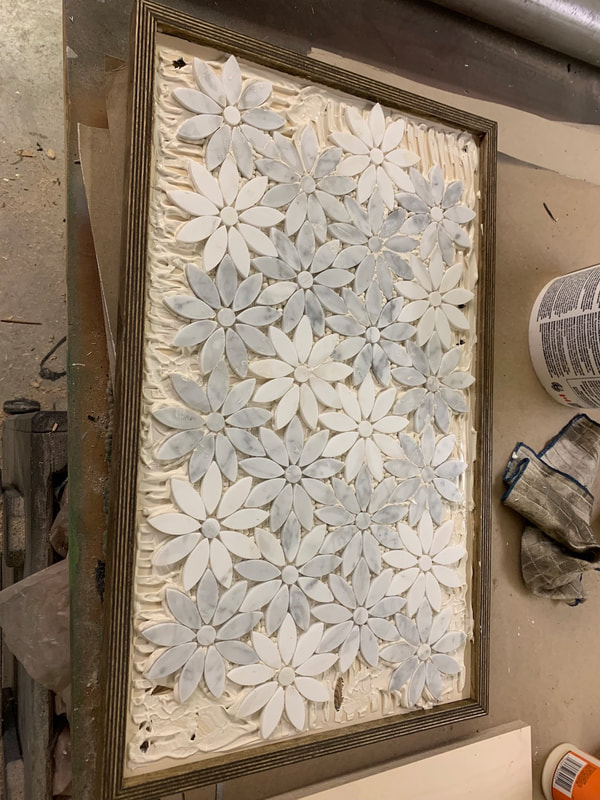
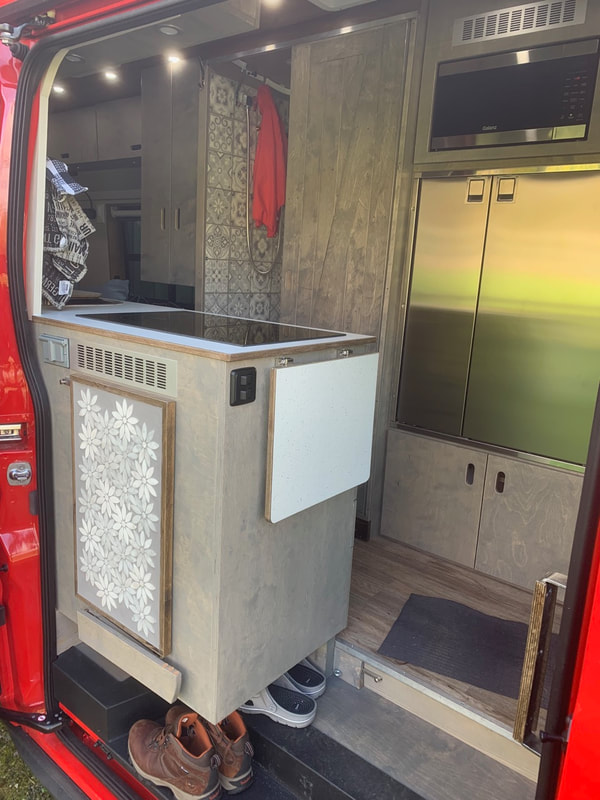
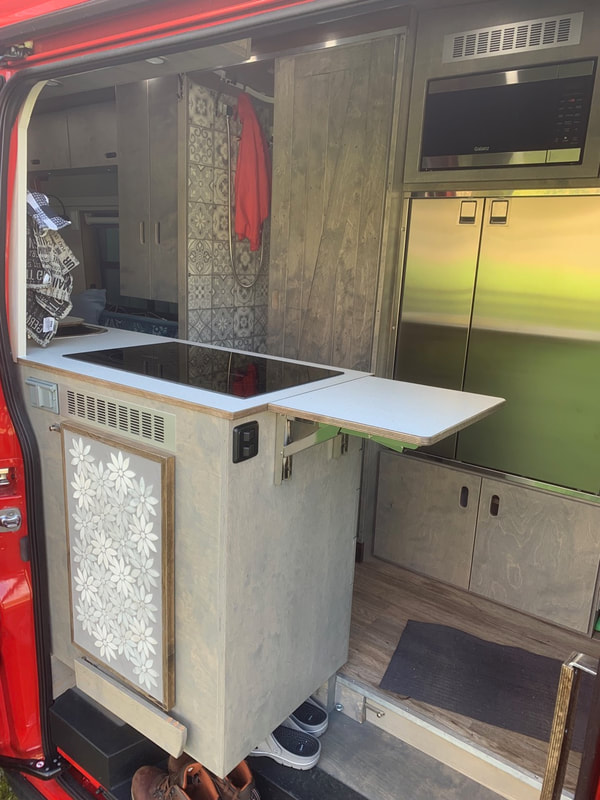
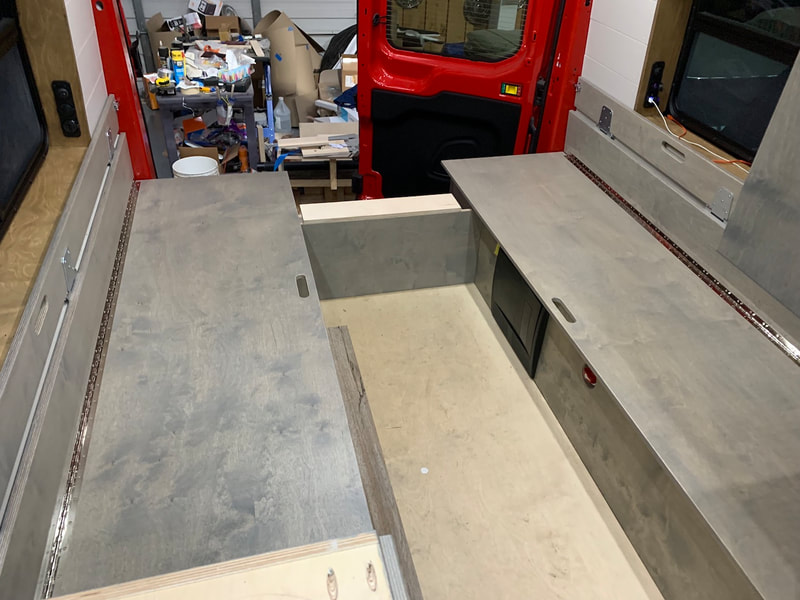
Progress and lots of finicky work on doors and trim has occurred over the last few days. I'm trying to do a slider door on the bathroom and it is challenging. Finding appropriate materials to maintain as slim a depth as possible (to not eat up interior space in the aisle between the bathroom and kitchen counter) while having sufficient strength has been a puzzle. In the end I settled on 3/8" plywood with 1/4" baltic birch attached - for the wall and also for the door. After installing the door and discovering the door was warped, I had to come up with a solution to straighten the door and also to strengthen the wall (too much flex.) After a couple of different attempts I ended up using 1/8" x 3/4" aluminum angle on the wall. It still flexes a bit but with several pocket screws holding it in place and also with the slider door in the channels, it is strong enough. It's certainly no worse than a couple of wall in our house where there are pocket doors. For straightening out the door I used angle aluminum as well but it was only 1/16" thick. At first I had trouble with the aluminum rubbing against the wall (and leaving black marks the way aluminum does...) I attempted to use a 1/8" straight flat piece but that wouldn't work because there wasn't enough meat to screw into in the door (if the door was a single piece of 5/8" plywood that may have worked.) Instead I decided to run the edge of the door through the table saw and take off some wood so the re-attached angle would have clearance to the wall in behind. That seems to work (for now - hopefully the door doesn't warp any further.) The boxes at the rear of the van serve several purposes: 1) that hold the foam mattresses in place, 2) they keep things from falling into the "black hole" space between the ends of the benches and the rear doors, 3) they'll act as end tables for when we have guests or we are watching TV (I'm making some cup holders), 4) they're great as night stands for the bed area to store odds and ends, and 5) I discovered this evening that if we want to we can store our Lagun table top in the space between the night stand box and the rear van door. The drop down table top for the back of the kitchen cabinet was grouted the other day. The glue I used to attach the tiles was a pain to use. It was very tedious cleaning/picking it off the sides of the individual flower petal tile pieces. I wanted to do this before grouting so that the glue would not be visible. All in all I think it turned out okay. Later on I'll attach the piano hinge after I decide what method I want to use to support the table when it is dropped down for use.
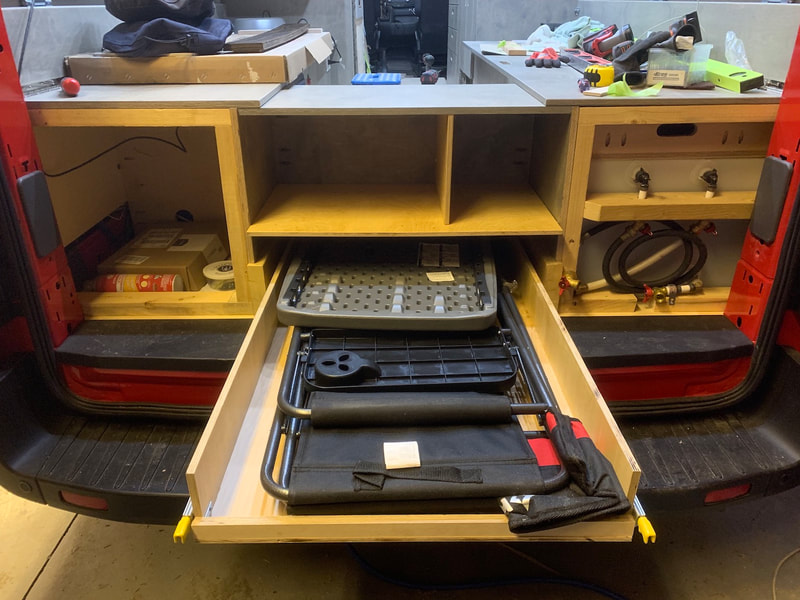
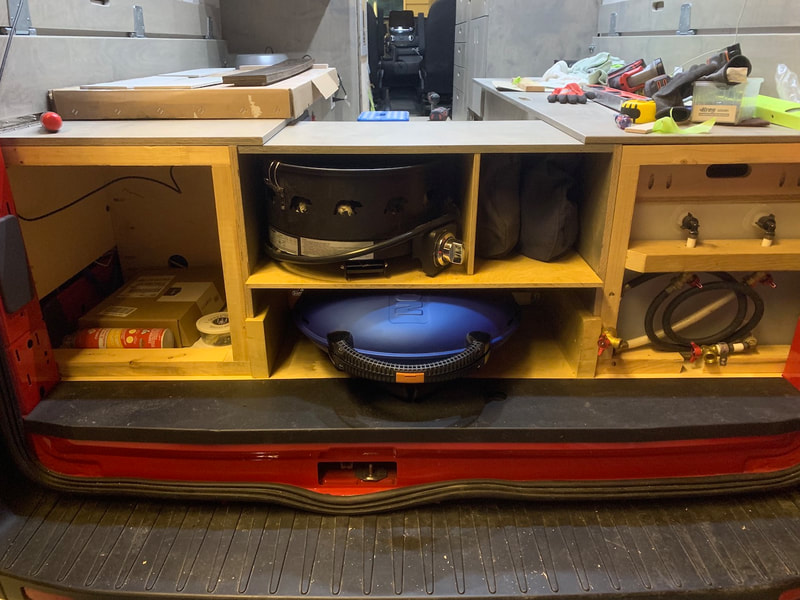
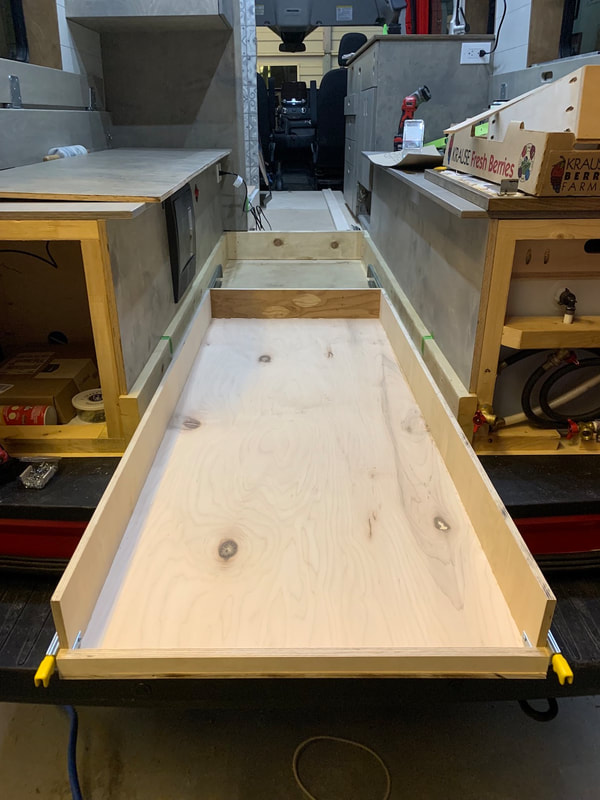
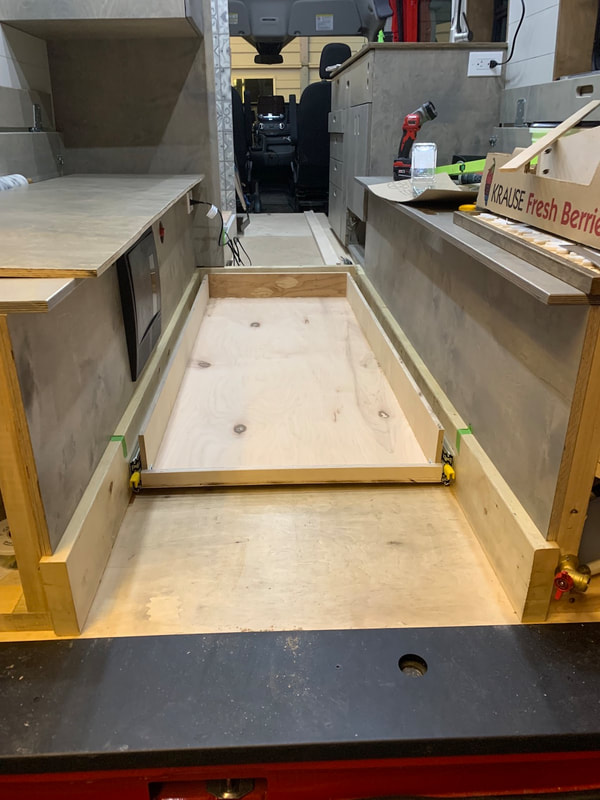
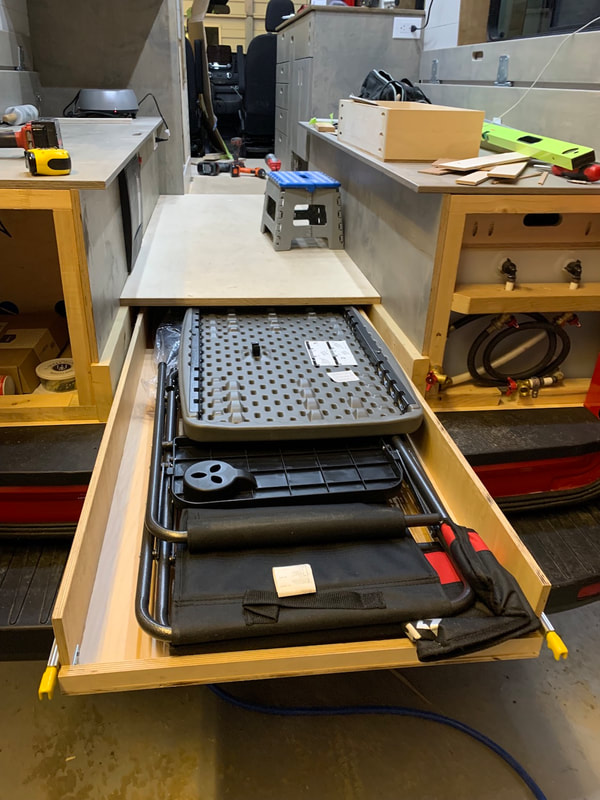
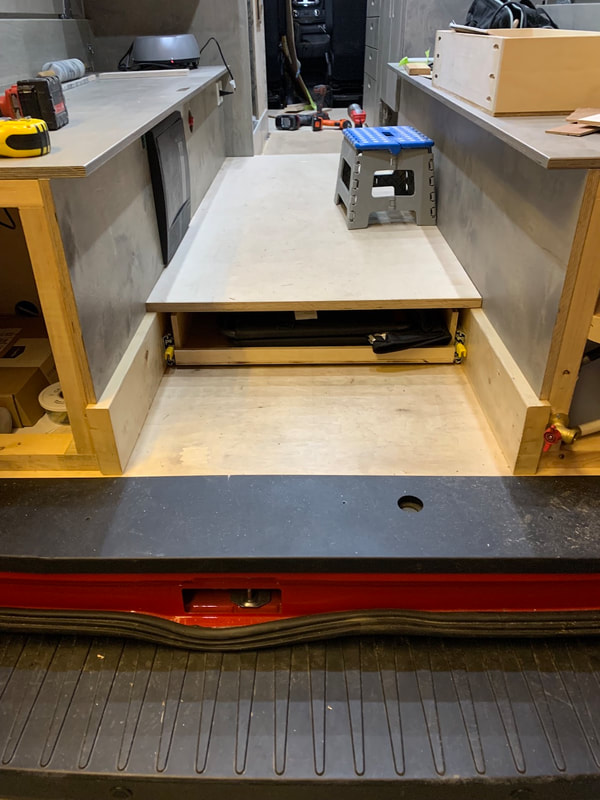
The large drawer for under the dining room floor is finished. This is where we will store our two camp chairs and possibly a small folding table (were still deciding whether we will need this or not.) The drawer glides are massive! 41" long, 3/4" thick, and very heavy. They're more difficult to install than standard drawer glides because they're so large, but also because they don't come apart (maybe I'm missing something but I couldn't find a trigger to release the slide from the side brackets.) For the bottom I ended up using 3/8" plywood that we had left over from when we finished the inside of our garage in 2008. One the sides I used 1/2" baltic birch and a piece of 3/4" fir plywood for the far end wall. Last night I was working on installing the half wall that the slider goes over for the bathroom, I was about halfway finished installing the 1/4" BB finish panels when I was mulling more about how the door would work... UGH! (and a few swear words in my head) It wouldn't work!! I realized that I had a rather grievous framing error from months ago. I had the two opposing end walls installed differently. They both had the same starting point at the base of the toilet and shower base, but when they went up to the ceiling, one wall was 5/8" offset from the other. I had done this thinking that a 5/8" gap was needed for the wall and a sliding door. But because I hadn't worked out the details yet and I did the panels on different days, I made the second wall incorrectly. With the walls being 40 inches apart, I never really noticed the problem. It didn't whack me in the face until after I had installed the half wall yesterday only to look up and think, "Gee, why does that one wall look like it's tipping forward compared to the other wall?" BECAUSE IT WAS!! After taking a few breaths I started working through potential solutions: add a filler wedge, cut a wedge to even them out, cover the gap with a panel or veneer,... One of the big problems was that it is in a highly visible area - it's the wall between the bathroom and refrigerator cabinet. So this morning I took 3 hours to very carefully cut away a 70" long wedge that was 5/8" at one end down to another at the other end. I clamped a 70" long square (3/8"x3/8") steel rod which we had laying around to the inside of the bathroom wall and used a box cutter knife to slice the vinyl that was already glued in place along the cut line from the ceiling to the framing base of the bathroom. Then I moved the steel rod to the finished side of the plywood and clamped it in place along the cut line. Again, I used the box cutter knife and broke the grain of the plywood panel along the cutline for the wedge shape. Then, keeping the rod in place, I used my oscillating saw with the flush cutting blade to slowly score the wood and then progressively cut through the sheet. This gave me a nice clean finish edge which gets a trim strip against it. I was relieved that it all worked out and the bathroom wall is back in place (where it's supposed to be...) and almost finished. We had bought some tiles that Angela really liked - they're flowers (Angela loves gardening, plants, flowers, trees, basically anything to do with nature!) The plan was to make some sort of wall hanging decor piece but as the construction continued we realized how little wall space we have in Redford. We have large windows and the TV still has to go in leaving not much space for hanging. As an alternative we came up with the idea of using the tiles on the back of the drop down table flap on the back of the kitchen cabinet in the cargo entry door. When it is not in use as a table, the flower tiles side will be showing. When dropped down the same laminate we have for our countertop will be exposed. We think it will look nice and hopefully it will be functional.
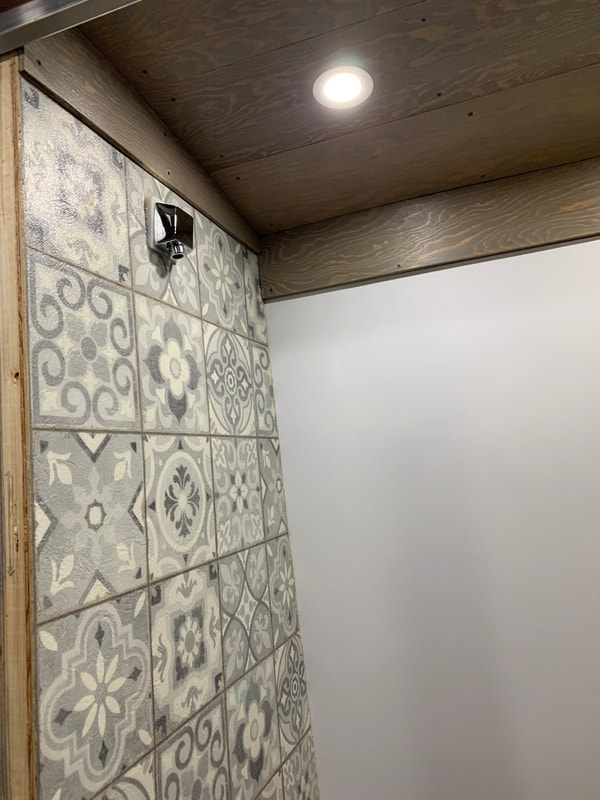
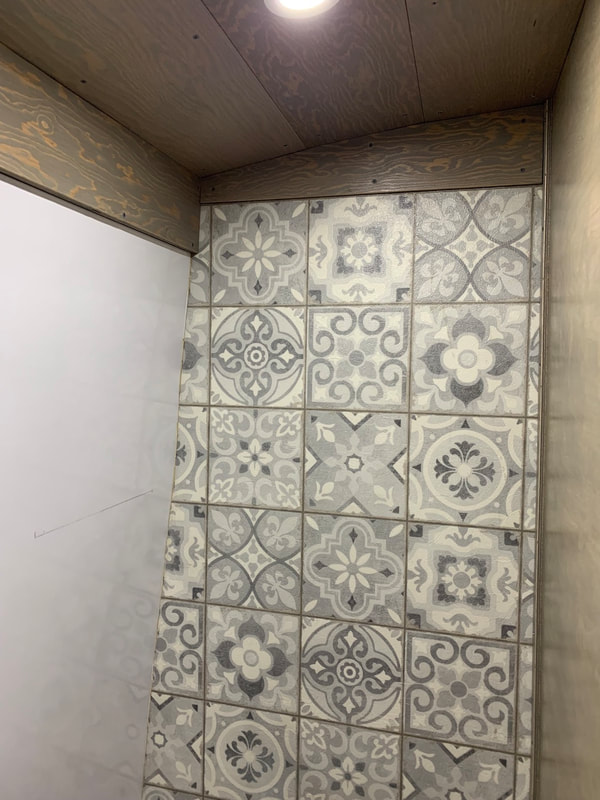
Today I glued in the vinyl floor sheet that we are using for our shower end walls (along with the FRP panel on the back wall.) Because the vinyl sheet is really meant to be used on a floor and the adhesive for vinyl is also meant for floors, it made for a bit of a messy process; while it wasn't too bad, it certainly wasn't easy as gravity was not my friend! I also installed the rest of the bathroom ceiling backer board and cut holes for the lights and ran the wires. Tomorrow I'll finish the cleanup on the adhesive and continue with the wood trim and finish pieces in the bathroom. Let's see how far I get tomorrow. Remembrance Day today. We observed our 2 minutes of silence. What an awesome life we have - and we owe it to the veterans and others who served through wars and conflicts to help preserve freedom and civility that we get to enjoy. Thank you.
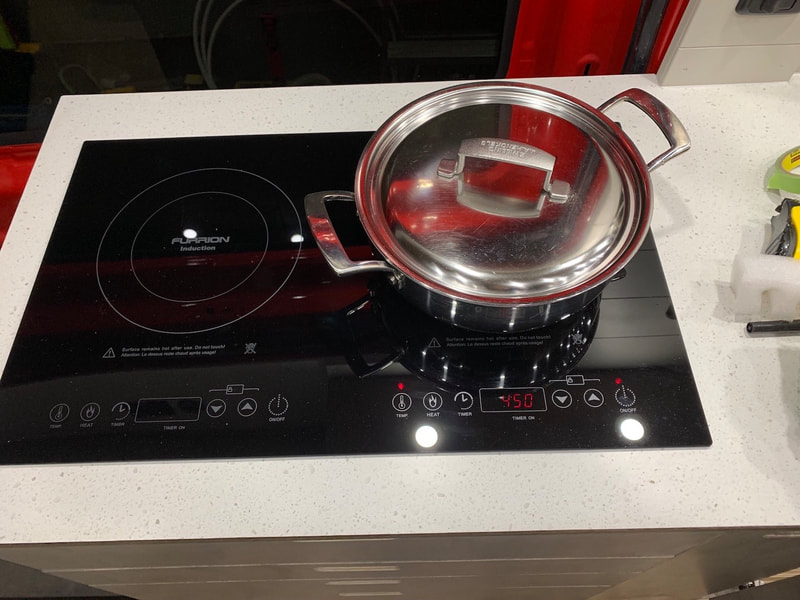
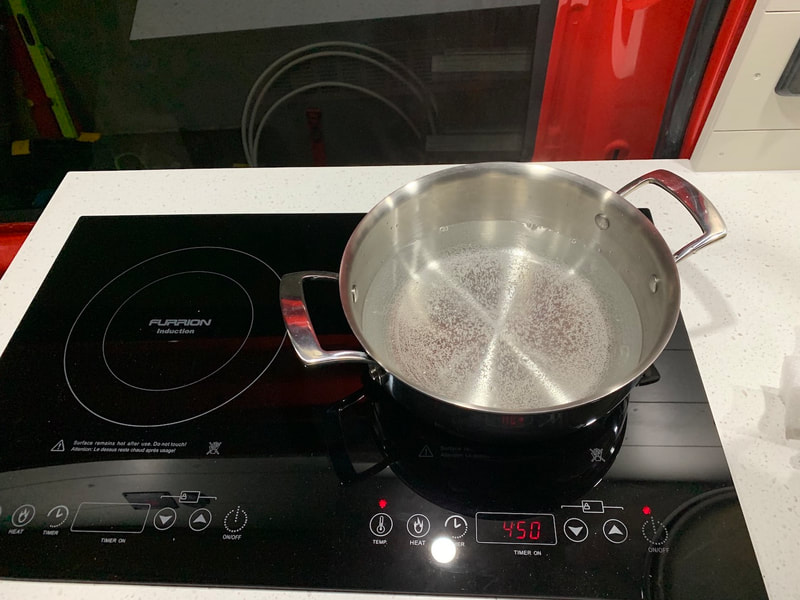
I got the shower base plumbing attached. It was a challenge to get the PTFE thread tape onto the threads for the slip joint as it is in an extremely tight space (under the sink support) but after several attempts - success! Besides the tight space I was also combatting static electricity which kept making the tape fly off the plastic threads. My solution was two fold. One - wet the threads so that the tape would stick to it and counteract the static repulsion. Two - use tweezers to manipulate the tape in place. After connecting the pipes I was able to water test both the sink and shower. Yay! No sign of leaks:) After doing plenty of research on ways to build a bathroom, we decided to go with our own design and not use a prefab base. It gives us the size we want (yes, it is still small - it's an RV after all!) and the aesthetic we want as well. For the walls we're using FRP (fibre glass reinforced plastic) panels for two of the walls and as an accent we've got some vinyl sheet flooring material that looks like Moroccan tile for the two end walls. In Canada, Home Depot only sells the highly textured FRP panels. I found a local source (Laird Plastics in Langley) to buy the smooth panels. Waterproofing it and making it functional for the toilet and shower are of course prime considerations. To waterproof the corners and where edges come together, I used Flex Seal tape. It's a 4" wide, thick vinyl tape with super sticky adhesive, not much different than the Eternabond tape that I used on the roof of Redford. But this tape is clear while the roof tape was white/beige. After carefully measuring and cutting the tape I took plenty of time to work the tape into the main seams that I wanted waterproof. Once the tape touches something it is pretty much stuck so going slow was important. I used a plastic shim to help push it right into the corners of the shower stall on one wall before allowing it to contact the second surface. Some of the adhesive kind of oozed out or stuck slightly in exposed places (like on the sink base.) That was easy to remove by using some Tuc tape (usually used for vapour barriers) to touch and pull off the misplaced adhesive as the adhesive would rather stick to the piece of tape as opposed to the stainless steel base edge. After getting the edges taped off, it was time to cut the FRP and install it. To prevent chipping I put masking tape along the cut line; using the Kreg Accucut guide and my circular saw (with the 60 tooth blade I've been using for all my plywood) I got good results. Using the FRP adhesive the panel was secured in place. I'll cut the openings for the niche and medicine cabinet tomorrow. Many tests happened today! I already told you about the cooktop and sink and shower base tests. I also filled the water tank and tested the pump and supply flow systems. All passed without any problems. The See Level tank monitors also worked properly. While we don't have mattresses yet (the YKK zippers for the mattress covers are delayed:( I did bring in our two Thermarest air mattress pads and tested out the bed panel with a short nap (zzzz)! At first I tried with the panel in seating configuration (which at 21" is as wide as a regular Thermrest pad) but found that too narrow. My right arm kept falling off. After taking 15 seconds to pull the bed panel out to sleeping arrangement, I had a comfy 28" inches of width and had a great nap. We hadn't taken Redford out for a drive in quite some time. I also wanted to get into the rain and do some testing. Since I applied Dicor lap sealant around all of the openings in the roof I wanted to make sure there was no water penetration. After a short drive in the rain the DC to DC charger got the battery back to 100% and the heavy rain during the drive did not show any signs of penetration. PHEW!!! Redford will stay outside tonight in the rain and I'll check everything again in the morning. Today I got in a full day's work on Redford. It's been busy at home but all is good. Angela is spending lots of time looking after Barley, our new puppy. She's a real cutie:) (Yes, I'm talking about Angela and Barley;)
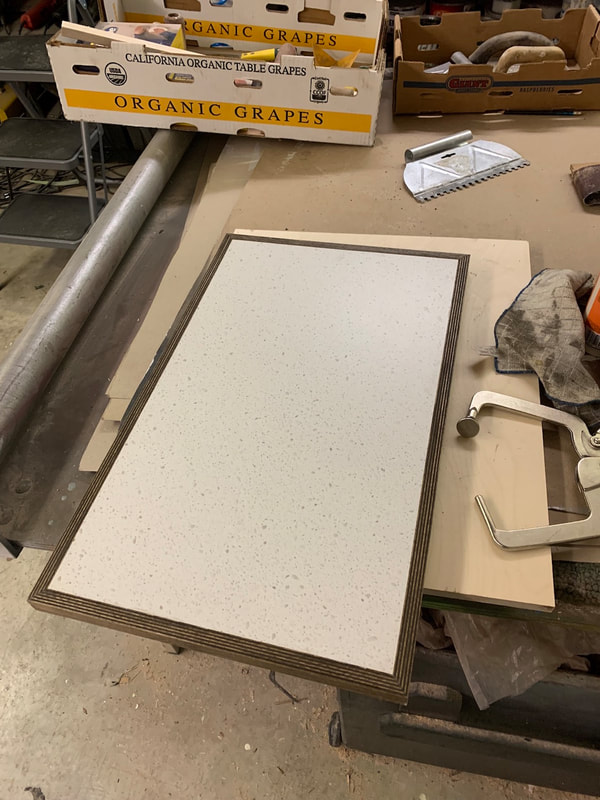
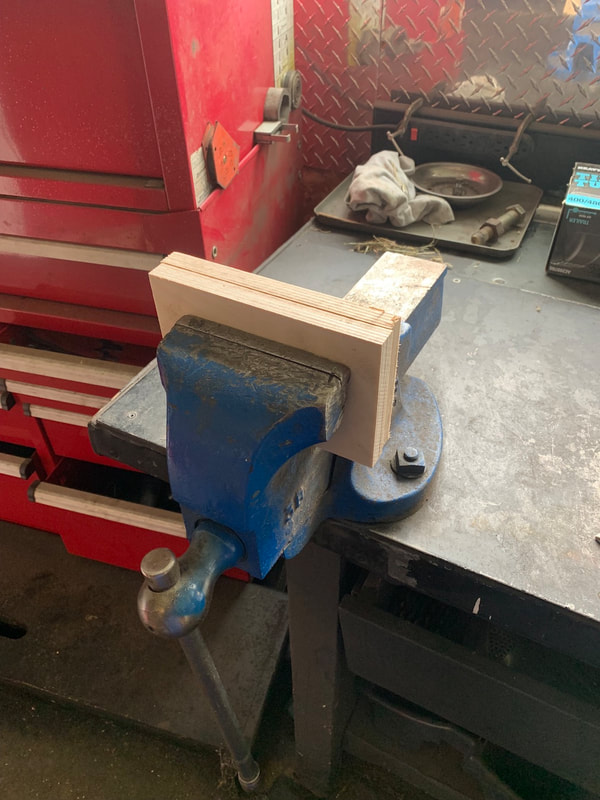
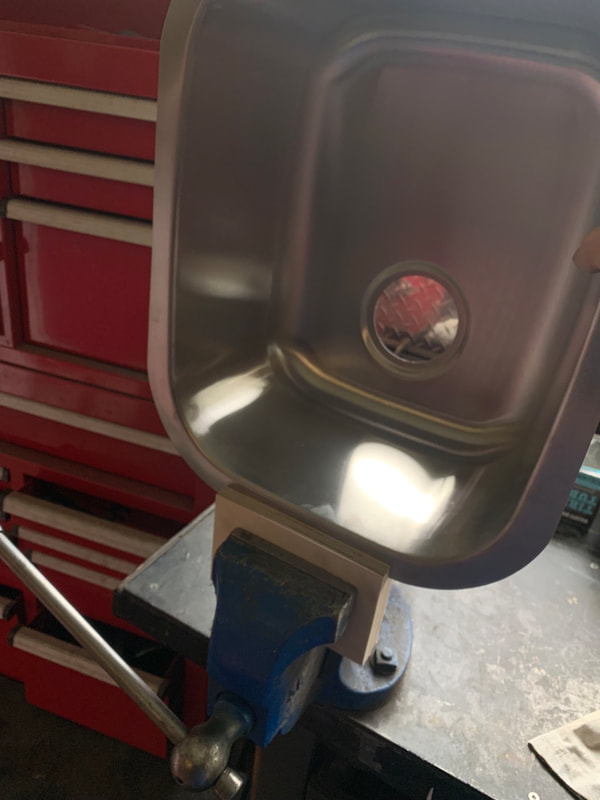
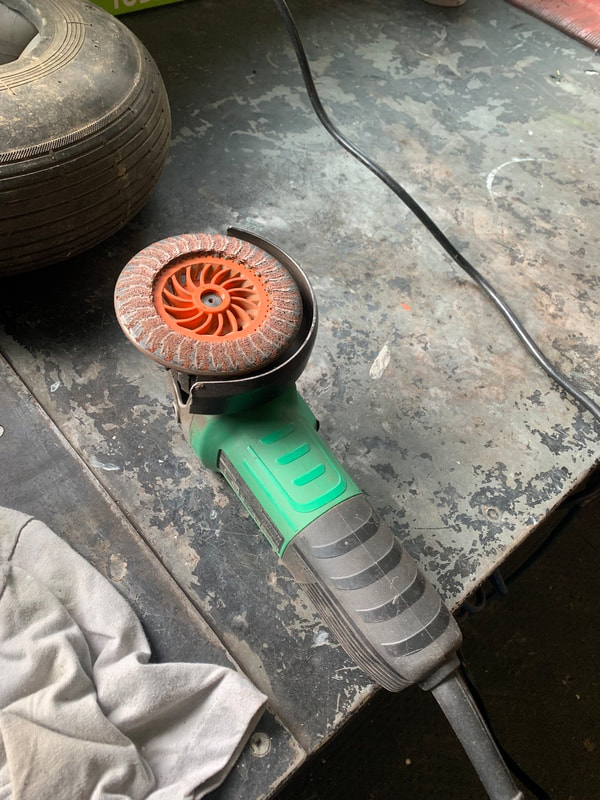
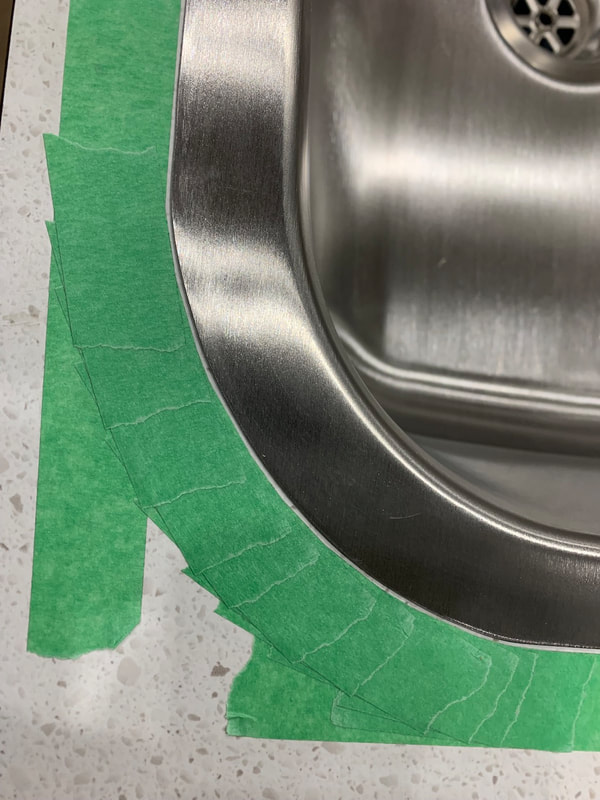
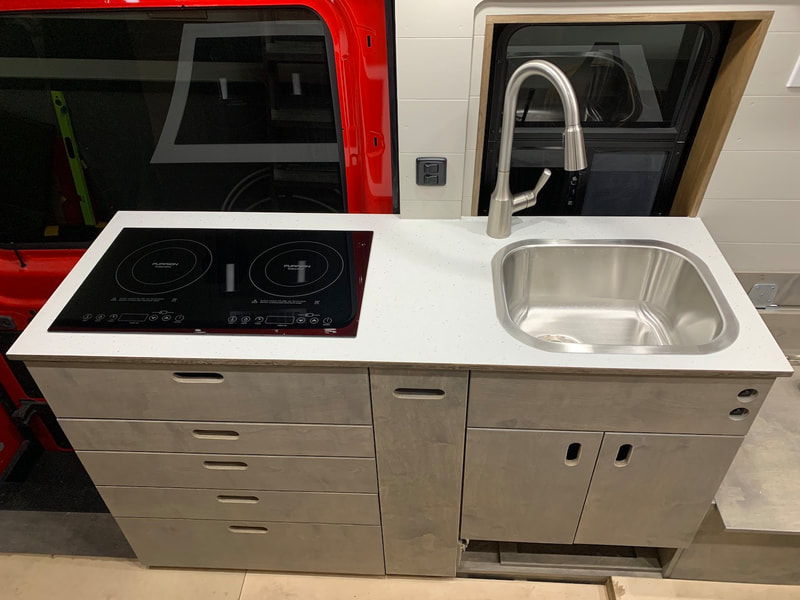
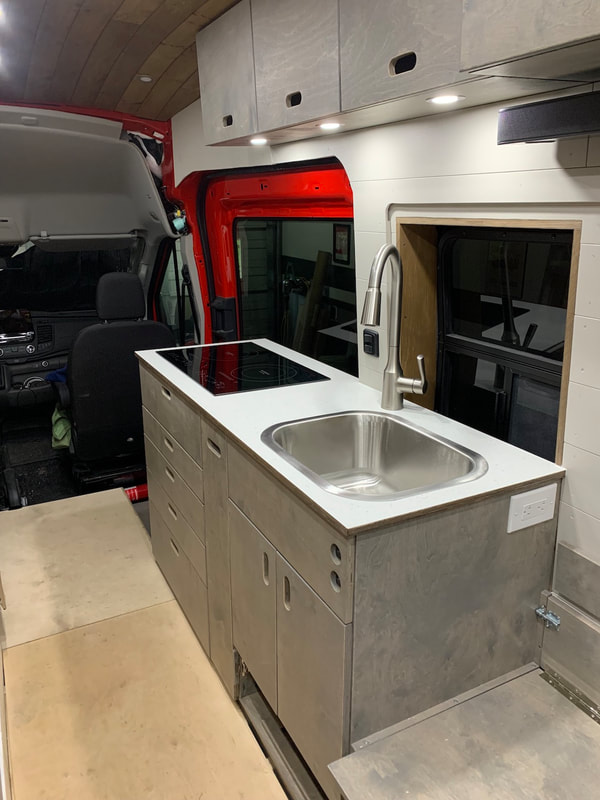
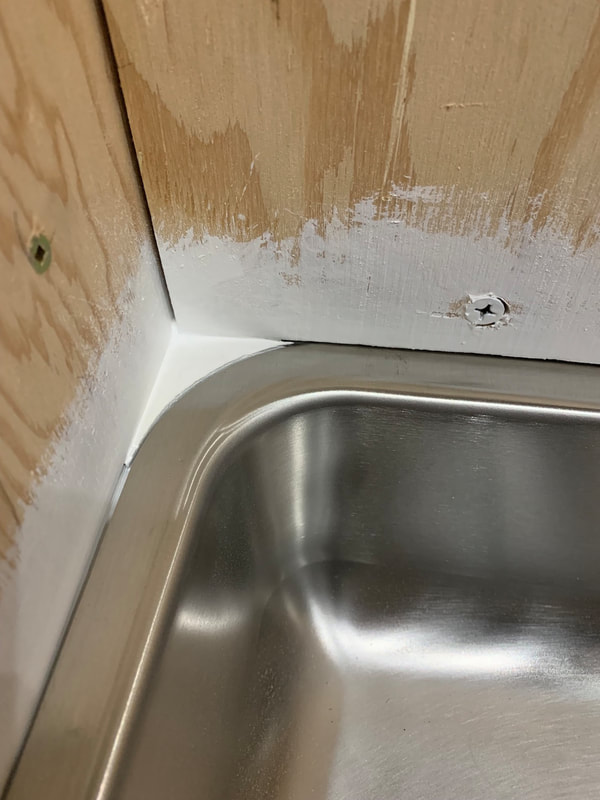
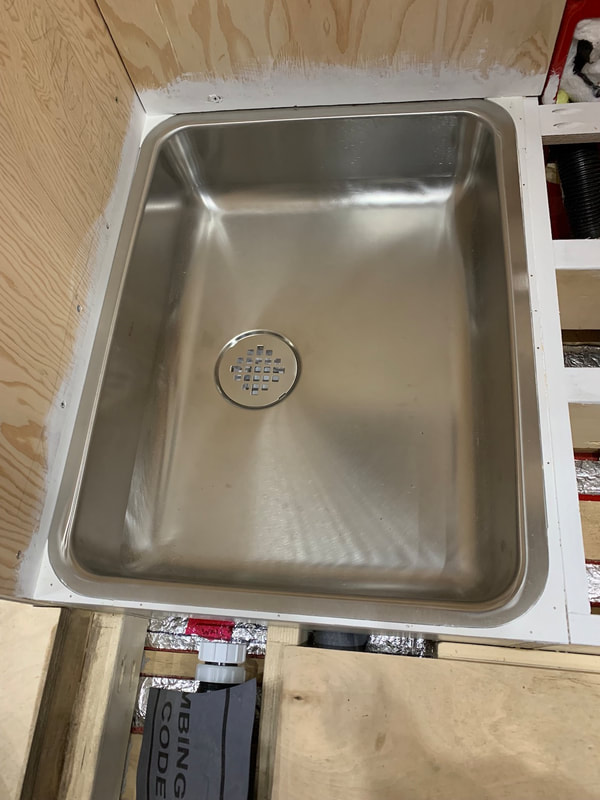
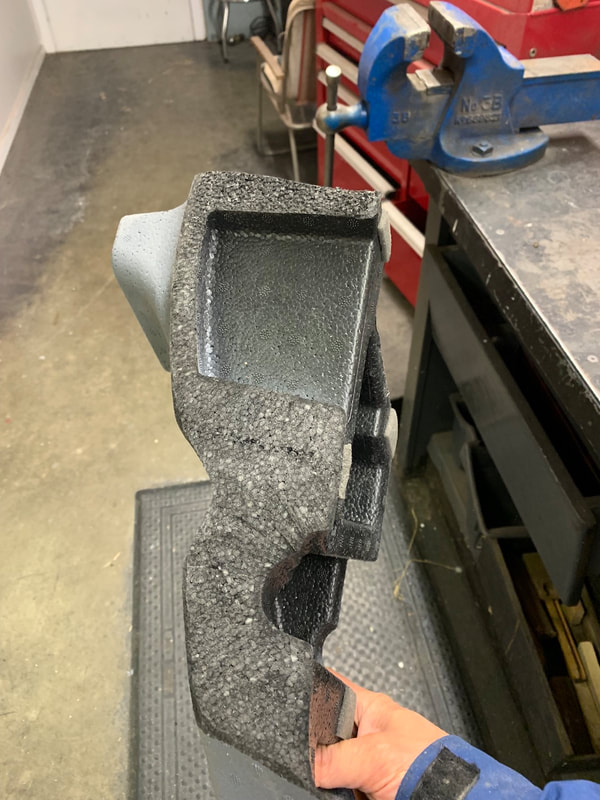
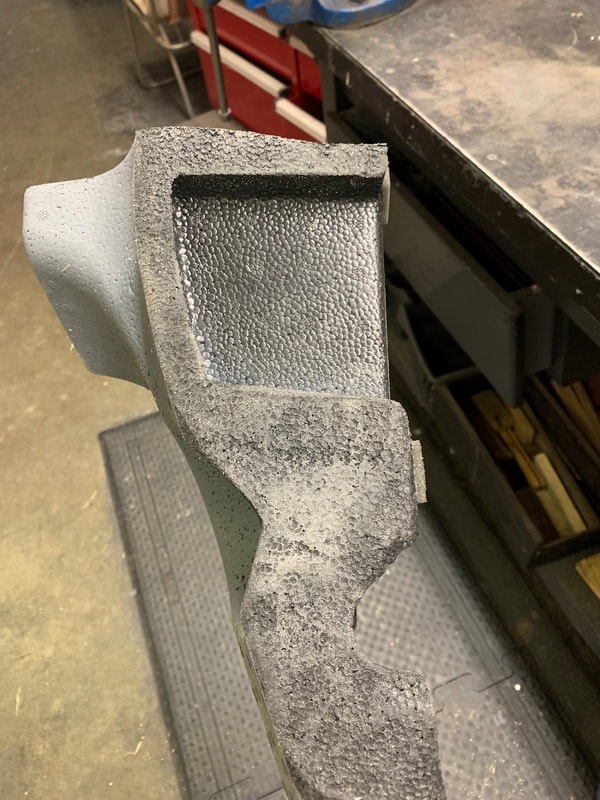
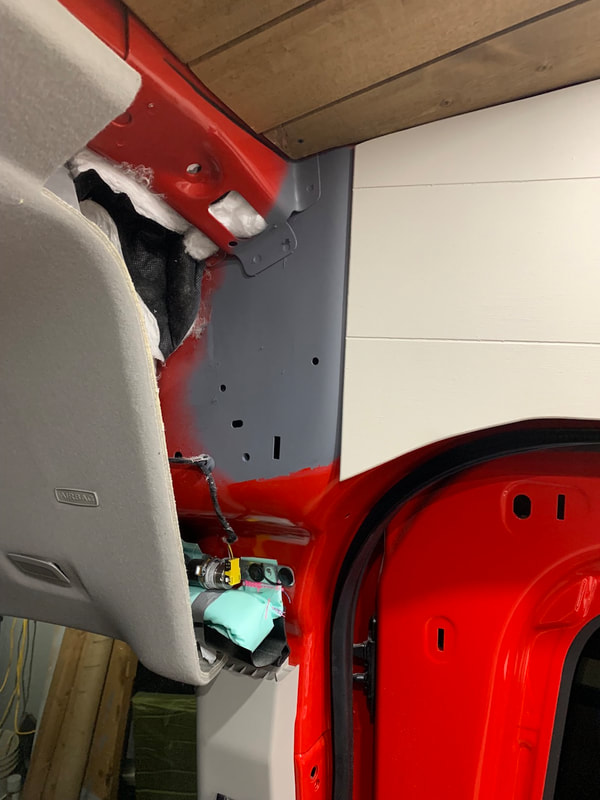
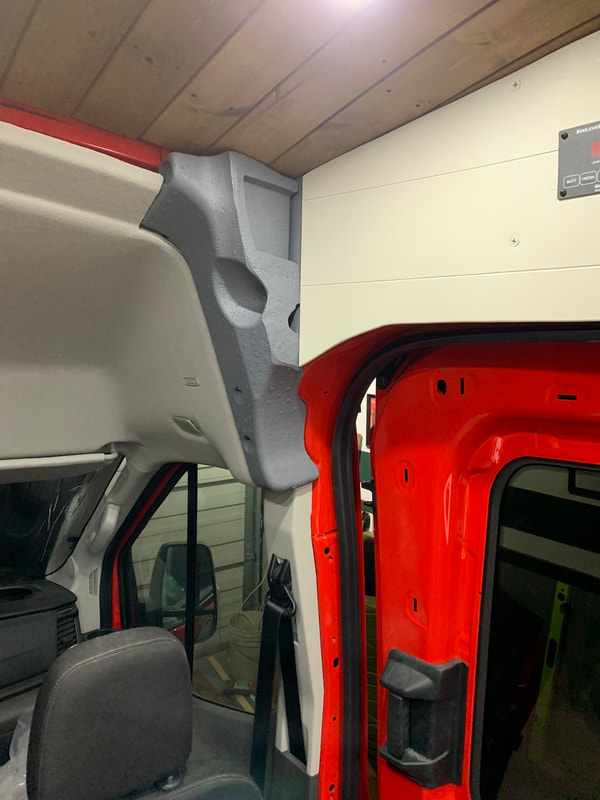
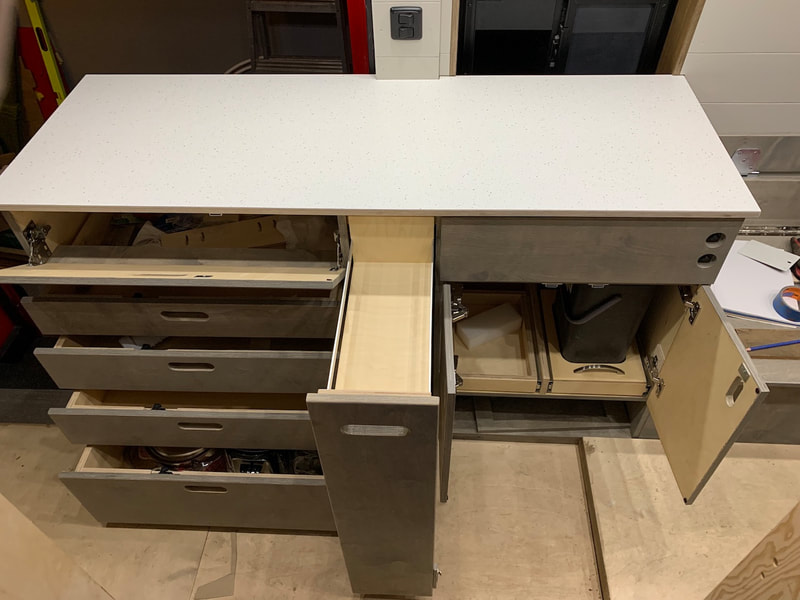
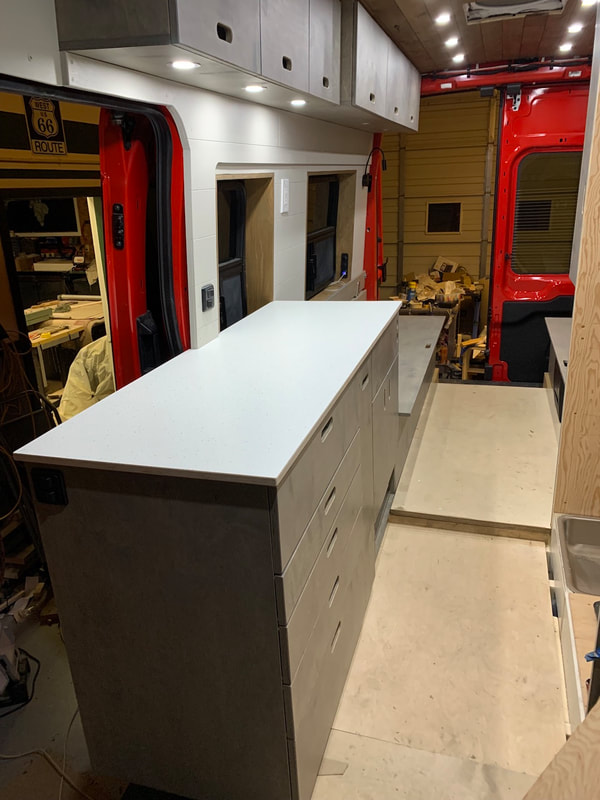
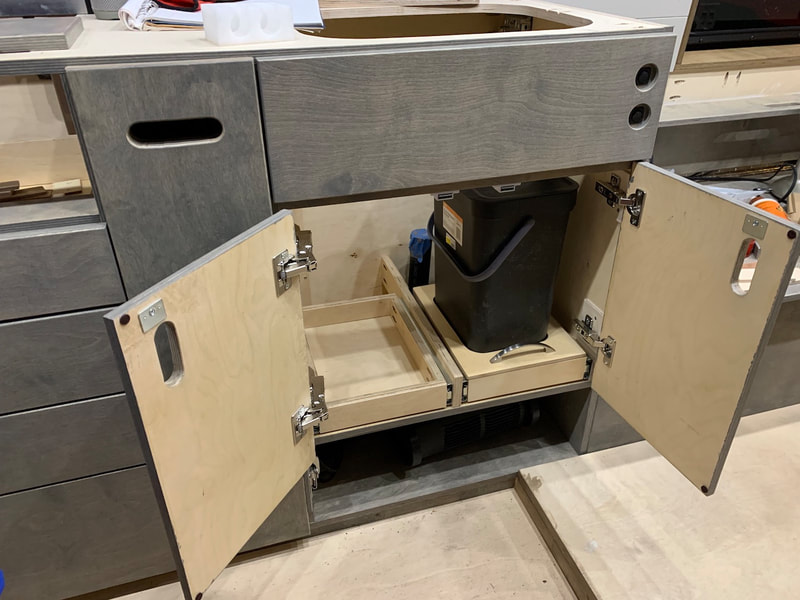
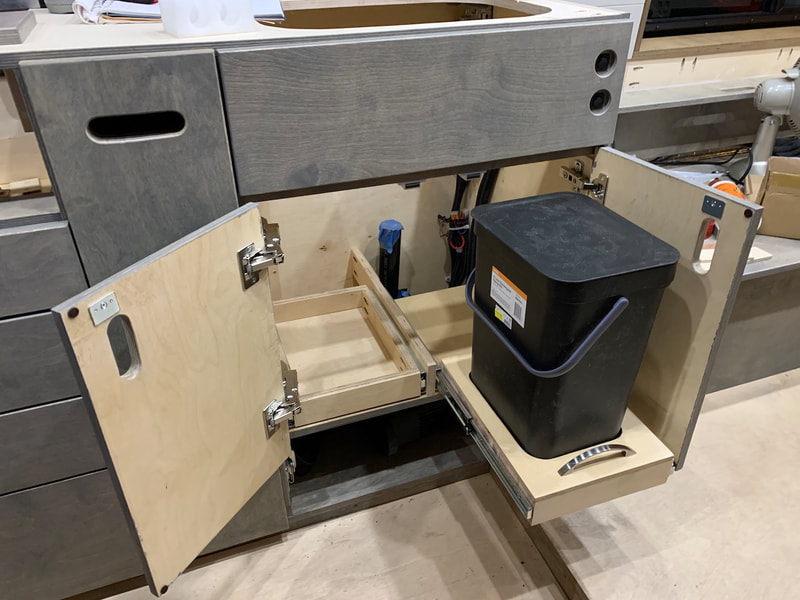
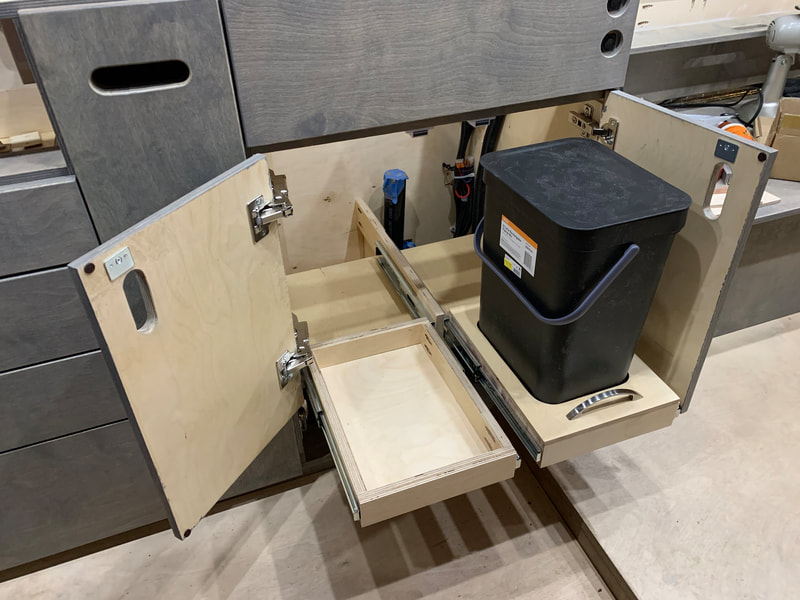
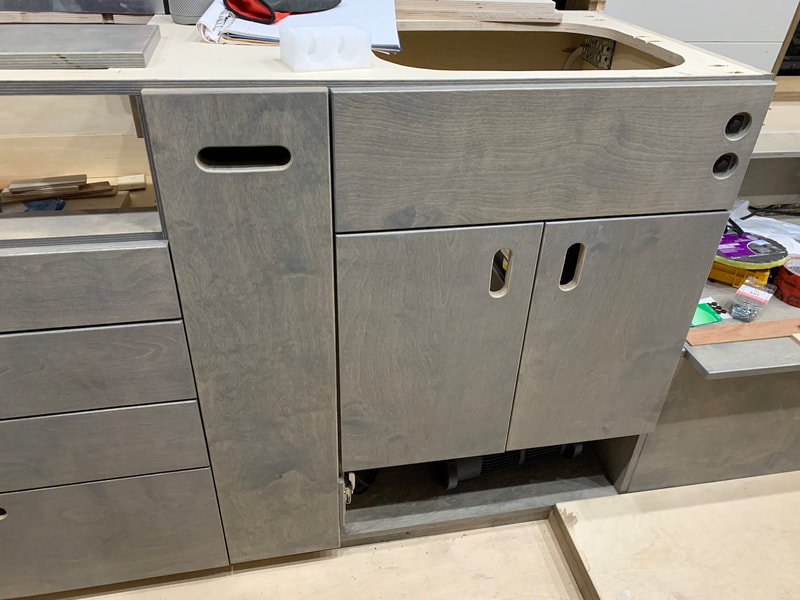
I can truly say the kitchen of Redford is 99.9% done. I'm still waiting for the little trays that install on the tip out false front in front of the cooktop. But everything is plumbed, the cooktop works, and the drawers and cabinets work well. I can't quite test the plumbing yet because I need to get the shower base installed before I can run water into the drain system. I'm sure I can test that out tomorrow. We had bought an under mount sink but because we switched from Corian to a laminate counter we had to install it as a drop in. I was able to modify it (burnish the sharp edges and bend the flanges a tiny bit) to install it using silicone sealant but there's a reason why you want to buy the right sink! I think it turned out really nice but the edges are not completely tight to the countertop because there no way to clamp it from underneath and pull it down tight. And working with silicone... well that's kind of messy. We'll have to see how long the silicone lasts as well. A 100% silicone for kitchens and baths was recommended to me at the local big box home store as it would be less likely to breakdown like a latex based sealant. Overall, I'm super pleased with how the kitchen has turned out. I know there will be loads of small installations still to complete but the bathroom is the only "big thing" left to do. Getting the sink that will be the shower base ready was a lot of finicky work. Bending the sink flanges (up so that water would flow into the sink) and putting spacers onto the supporting lip took a long time. I needed the spacers so that the Flex Seal tape that I'm using to water proof will direct water into the sink base and not towards the walls. The van came with two giant foam "blobs" on either side of the cab just behind the seats. They are made of a special foam and they will burst off the side of the van in the case of an airbag deployment from above the windows on either side. The foam is like what you find in bike helmets - that way if it hits you during an airbag deployment you shouldn't get severely injured. Some people take the foam out and frame the area in wood or other material. Some people use glue and fabric to cover them. I decided to try and keep it simple - cut them to fit my ceiling and panelling, paint them, and reinstall. Contact cement sure is smelly stuff. Thank goodness I have a mask that works to filter out solvent fumes (I also wear it when cutting the plywood so I don't breath in the dust.) I cut the laminate sheet and found that after I had cut only to the rough dimensions that there was loads of laminate remaining (it was a 4'x8' sheet and we only needed 22" x 59" for the oversized rough working piece.) I decided to leave our options open and glued laminate onto a couple of pieces of plywood that might act as our Lagun mount table and a piece for the drop down table on the back of the kitchen cabinet in the sliding cargo door area. Then we can decide if we want just straight plywood, laminate, or something else. For the glue process using contact cement: getting an area set up, collecting supplies, pouring out most of a can of cement into the roller tray, buying a special roller for adhesive application, etc., I wanted to take advantage of this opportunity as it wasn't much more work to do two more pieces. It also gave me some learning experience... When applying contact cement with a roller (much easier than with a brush - I was doing that too for something else) do not go back and forth with the roller and cement. Only dip and then roll in one direction to spread the glue, lift the roller to come back, then press down and roll forward again. On my "practice sheet" I found going back and forth like you do with paint, the cement goes goopy, starts to set, and makes globs.
After dinner I was able to get the countertop cut, test fitted, and then did the final cut and routing. Tomorrow I will cut out the openings for the induction cooktop and sink and drill the hole for the faucet. I was thinking about drilling from underneath to transfer the cooktop and sink cut lines when Angela had a MUCH easier solution and asked, "Why don't you just trace it from underneath...?" Duh! (Thanks Ang!) Angela and I both though the laminate had a tiny bit more grey flecking in it than the small sample we had but we are quite happy with that.. Of the two samples that we liked this actual piece was a good blend (but still closer to the lighter one) of the two. I did a test on the foam blob that covers the airbag in the rail above the driver and passenger doors. I had tried using the regular (but excellent quality paint we had left over for some house painting which has been used on the wall panels) to see what would happen. The paint flaked and chipped off. Yesterday I bought a spray can of grey primer that said on the front "bonds to plastic" and gave that a try - yup, it stays well adhered to the foam so I'm going to spray out the blob with that paint and reinstall it. It feels good completing one phase and moving onto the next.
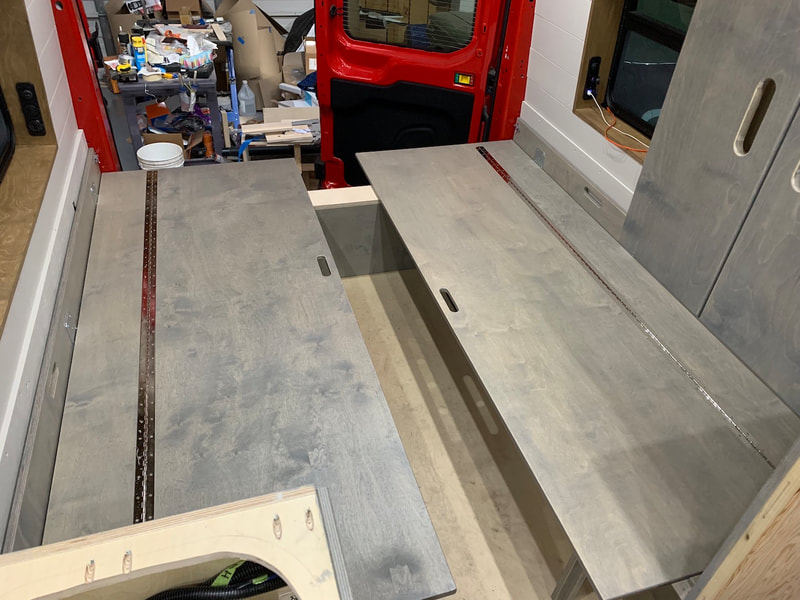
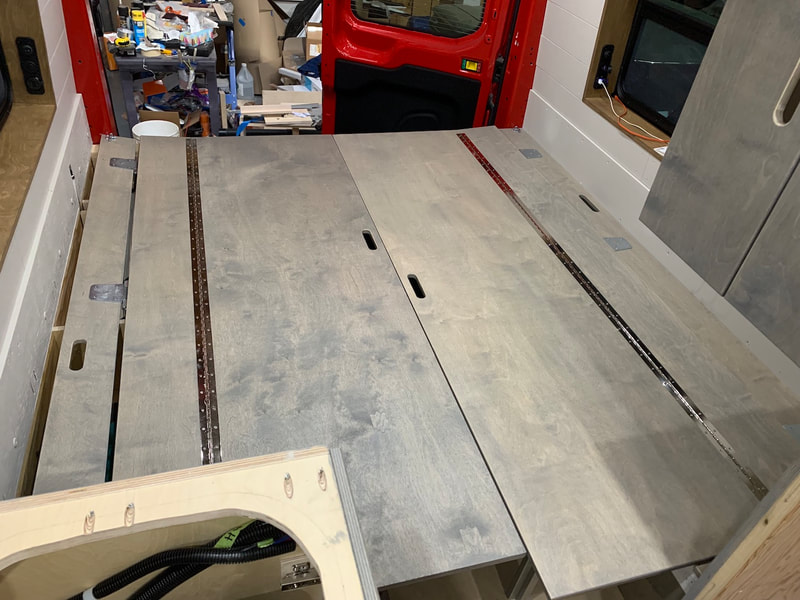
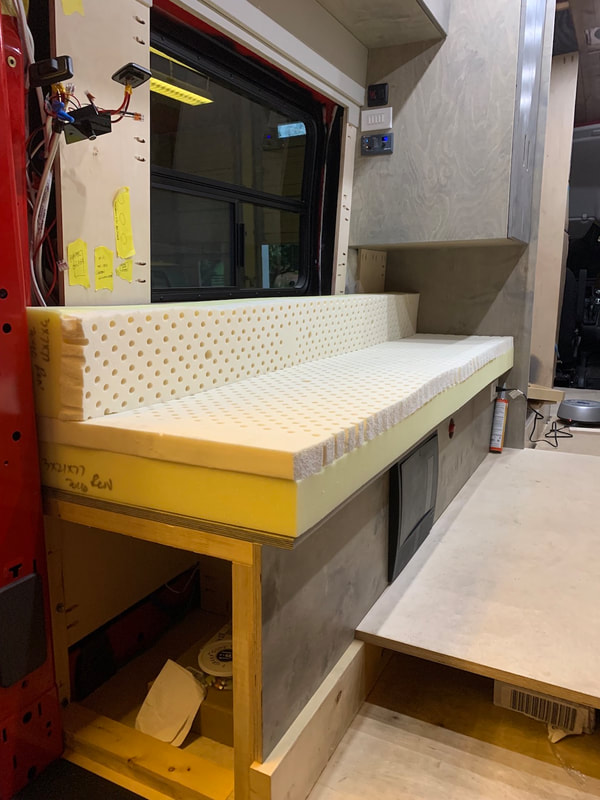
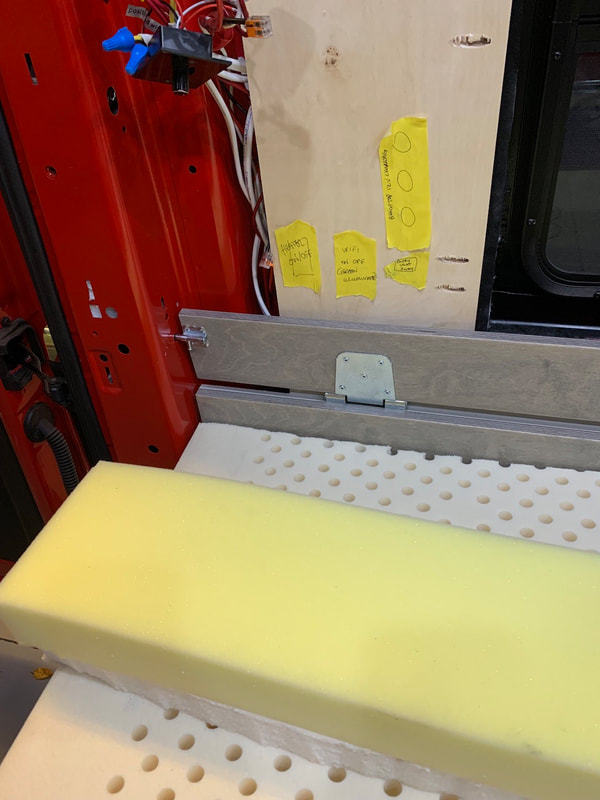
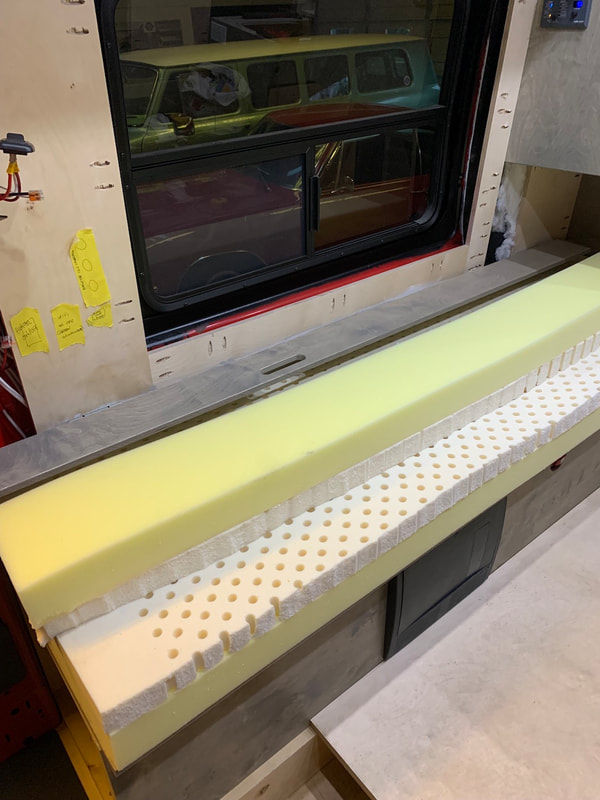
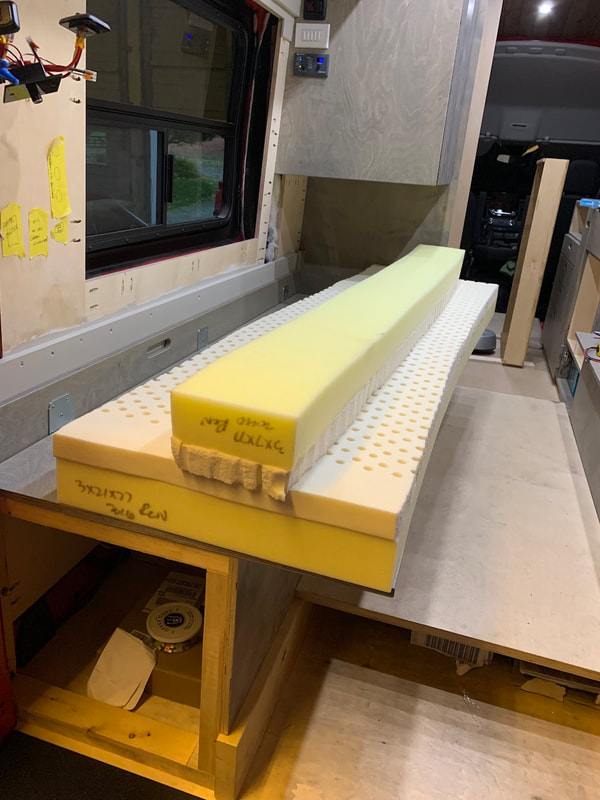
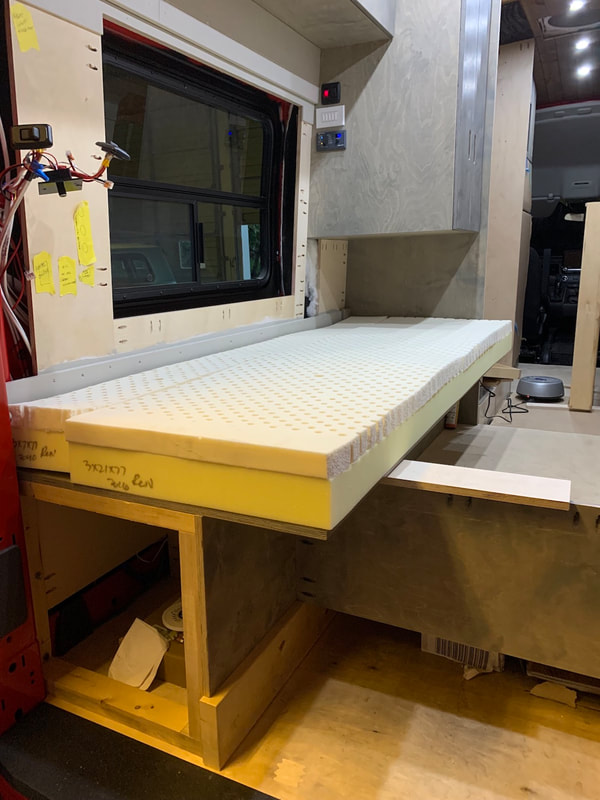
The convertible eating area and beds are essentially complete. The wall paneling was finished the other day which also meant that the electrical switches in the area are wired in and installed. Today I attached the fold down legs onto the bed panels. The main things to finish up for the bedroom are the support arms to hold up the panels when we are going into those storage areas and garage, which acts as the support section for the head areas of each bed. In the kitchen the cabinetry is 99% complete. The only thing to do for cabinets is to install the 2 small trays onto the tip out false front in the cooktop area. The countertop is the big thing remaining for the kitchen. I'm picking up the laminate (special order) and I'm hoping that this weekend I can glue it to the plywood and maybe even finish the countertop. We ended up going with laminate because the Corian was going to be really expensive and they wouldn't give us the cut sections. Real work went into the bathroom today. The way my brain works is I will ponder a situation and then "avoid it" for a while. I'm kind of thinking it's procrastination but I think in reality it's not. I need to percolate over ideas, and let some ideas go and new ones to come in. Then when it comes time to actually get to it, I can draw on the various thoughts and really get into the functional details. Of course when the work actually happens, things don't always go as planned but at least I then have a framework for knowing what I'm trying to achieve and use that as a basis for continued decision making. We had custom sized laminated latex and foam mattresses mad for Redford. I picked them up on Tuesday and did a test fit yesterday. The goal was to have comfortable seating for the day but an easily convertible bed for sleeping at night. In terms of bedding I'm planning on using a sleeping bag most of the the time and Angela is thinking of using a comforter "taco style." This will allow for quick take down and set up of the bed. I'm going to see about stuffing the sleeping bag and comforter into cushion covers so that they will act as cushions during the day and not need extra storage space. I laid on the cushions and they are very comfortable.
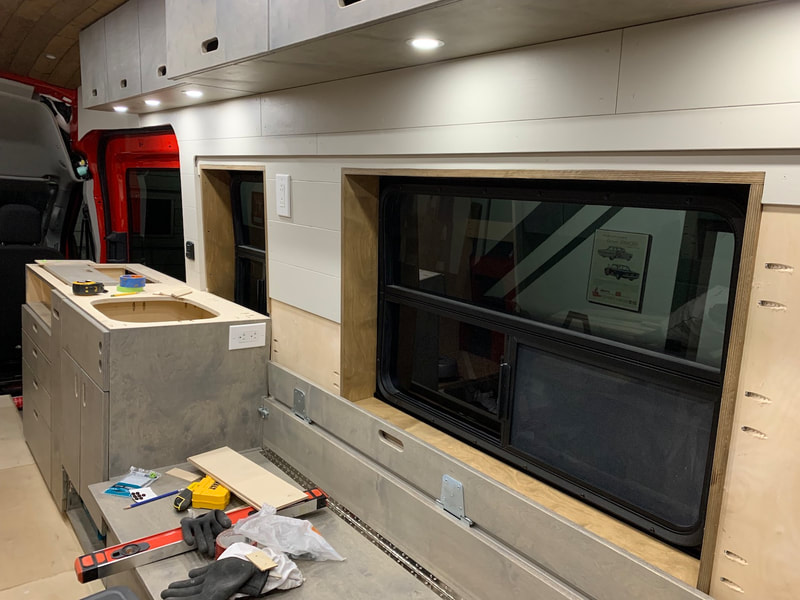
I got all of the window frames installed today. This allowed me to continue with panelling the walls. |
Details
AuthorCalvin here - after spending almost 33 years in education as a high school teacher, elementary teacher, and elementary administrator, it was time to retire! I did so happily and with no regrets; it was a terrific and fulfilling career. I do enjoy building projects as the design and building process is very therapeutic and you see a completed functional product in the end. Now to combine the build with another of Angela's and my passions - travel - is something we're really looking forward to. Archives
September 2022
Categories |

 RSS Feed
