|
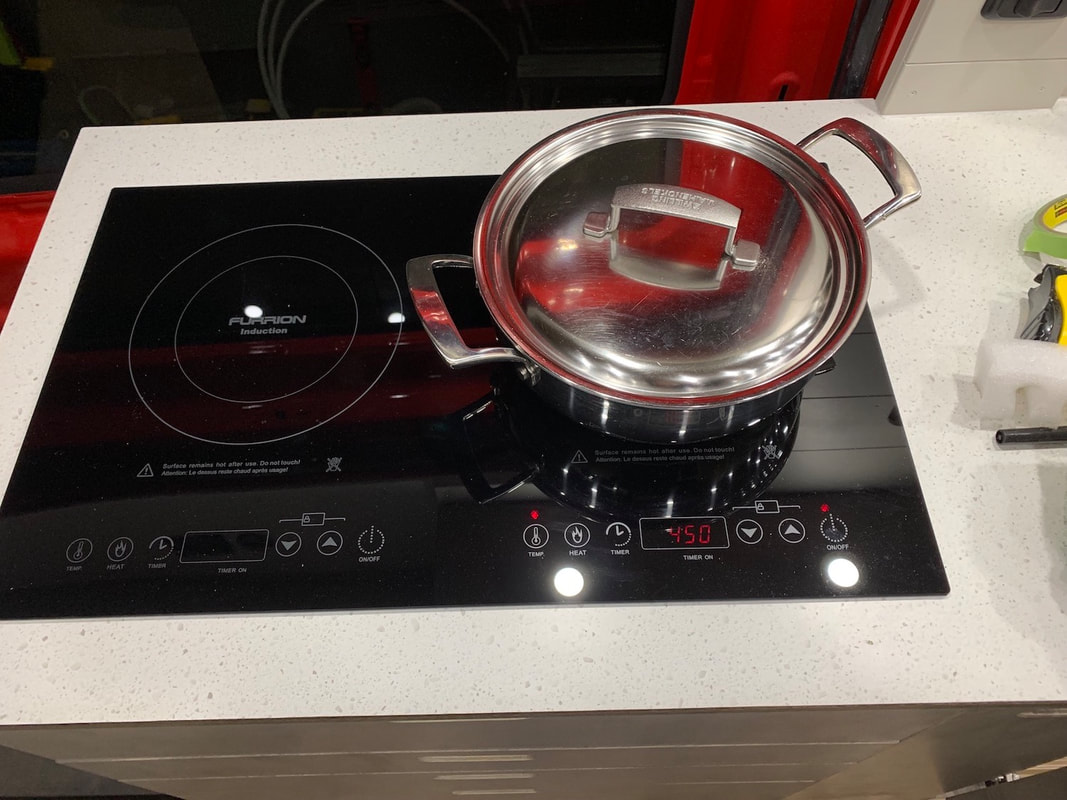
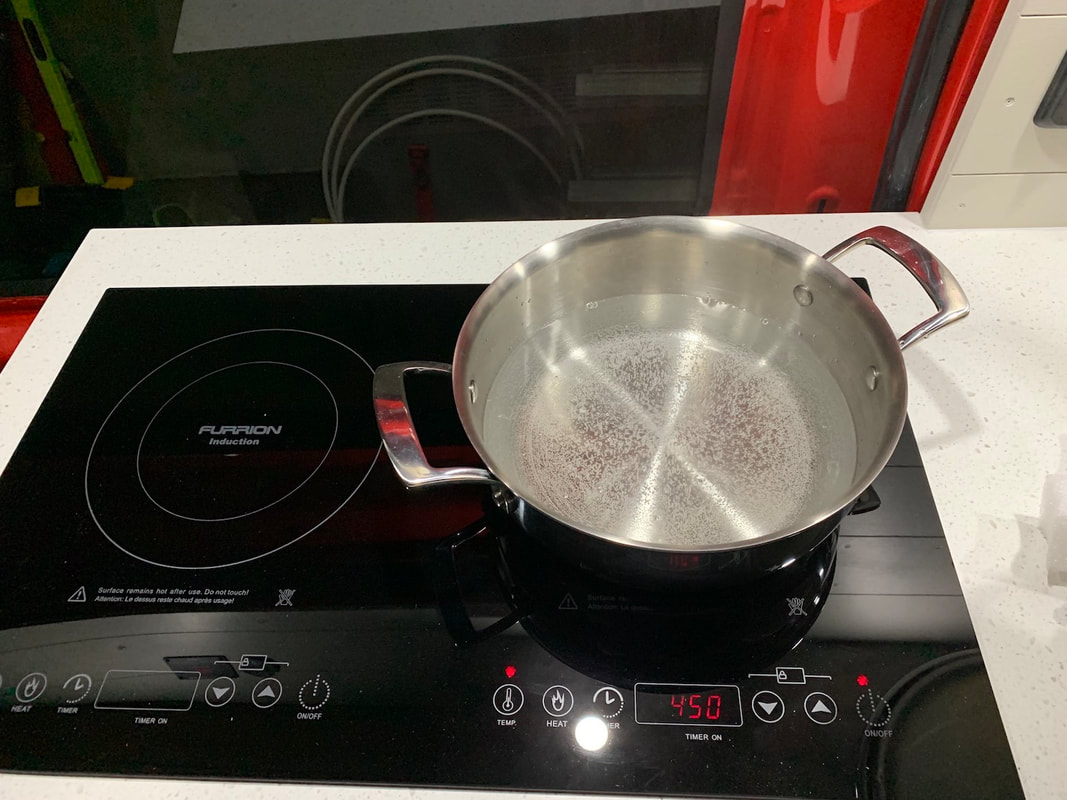
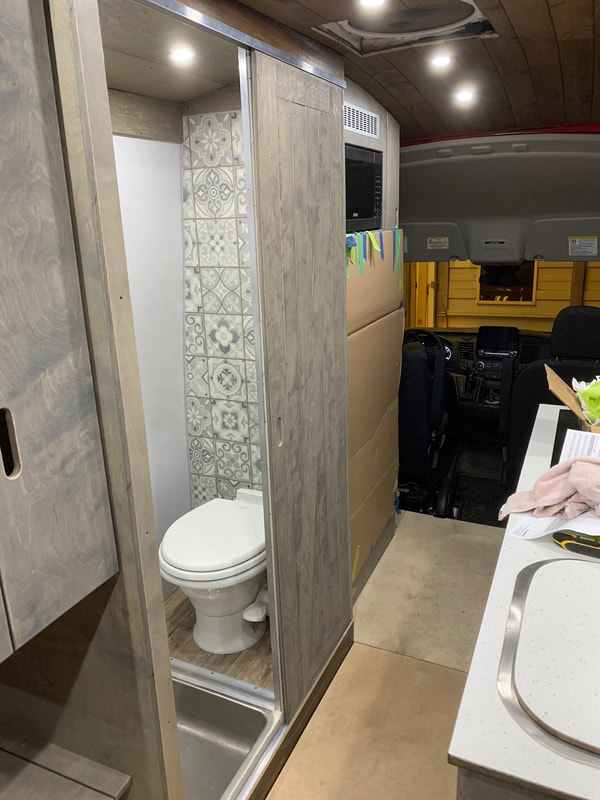
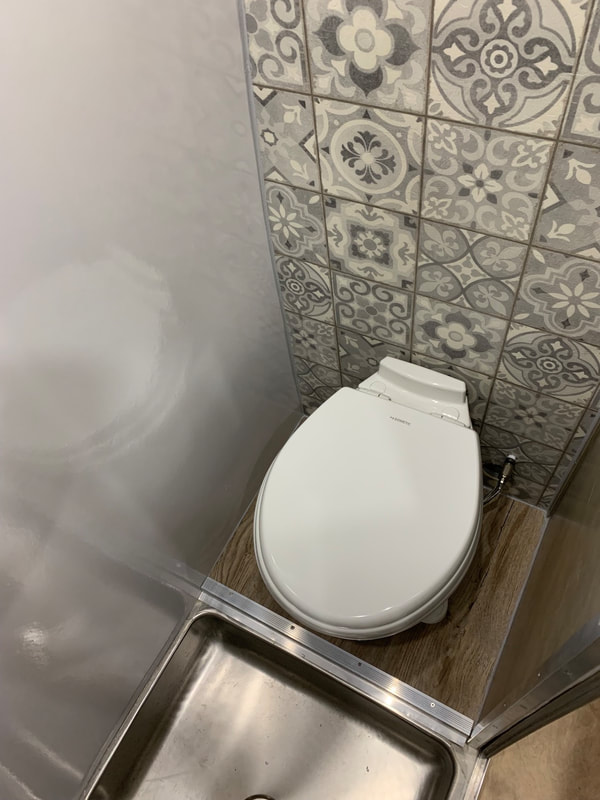
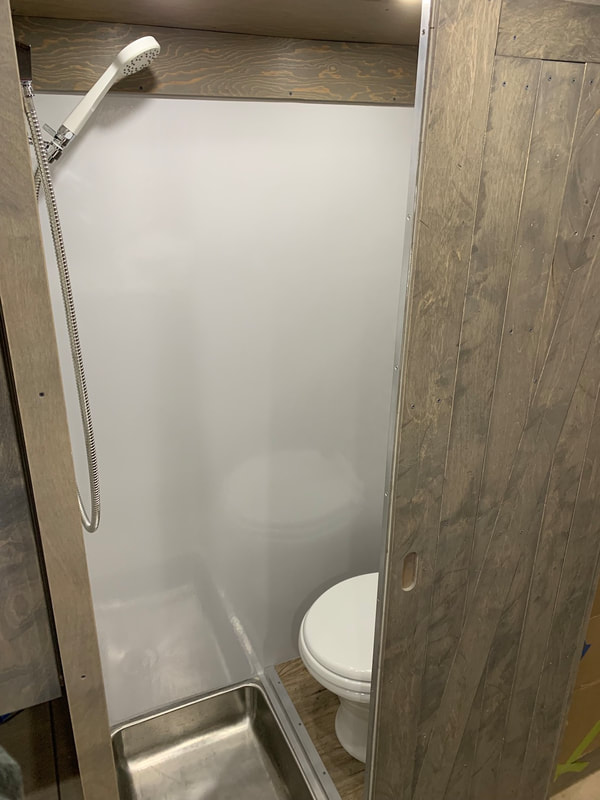
Remembrance Day today. We observed our 2 minutes of silence. What an awesome life we have - and we owe it to the veterans and others who served through wars and conflicts to help preserve freedom and civility that we get to enjoy. Thank you. I got the shower base plumbing attached. It was a challenge to get the PTFE thread tape onto the threads for the slip joint as it is in an extremely tight space (under the sink support) but after several attempts - success! Besides the tight space I was also combatting static electricity which kept making the tape fly off the plastic threads. My solution was two fold. One - wet the threads so that the tape would stick to it and counteract the static repulsion. Two - use tweezers to manipulate the tape in place. After connecting the pipes I was able to water test both the sink and shower. Yay! No sign of leaks:) After doing plenty of research on ways to build a bathroom, we decided to go with our own design and not use a prefab base. It gives us the size we want (yes, it is still small - it's an RV after all!) and the aesthetic we want as well. For the walls we're using FRP (fibre glass reinforced plastic) panels for two of the walls and as an accent we've got some vinyl sheet flooring material that looks like Moroccan tile for the two end walls. In Canada, Home Depot only sells the highly textured FRP panels. I found a local source (Laird Plastics in Langley) to buy the smooth panels. Waterproofing it and making it functional for the toilet and shower are of course prime considerations. To waterproof the corners and where edges come together, I used Flex Seal tape. It's a 4" wide, thick vinyl tape with super sticky adhesive, not much different than the Eternabond tape that I used on the roof of Redford. But this tape is clear while the roof tape was white/beige. After carefully measuring and cutting the tape I took plenty of time to work the tape into the main seams that I wanted waterproof. Once the tape touches something it is pretty much stuck so going slow was important. I used a plastic shim to help push it right into the corners of the shower stall on one wall before allowing it to contact the second surface. Some of the adhesive kind of oozed out or stuck slightly in exposed places (like on the sink base.) That was easy to remove by using some Tuc tape (usually used for vapour barriers) to touch and pull off the misplaced adhesive as the adhesive would rather stick to the piece of tape as opposed to the stainless steel base edge. After getting the edges taped off, it was time to cut the FRP and install it. To prevent chipping I put masking tape along the cut line; using the Kreg Accucut guide and my circular saw (with the 60 tooth blade I've been using for all my plywood) I got good results. Using the FRP adhesive the panel was secured in place. I'll cut the openings for the niche and medicine cabinet tomorrow. Many tests happened today! I already told you about the cooktop and sink and shower base tests. I also filled the water tank and tested the pump and supply flow systems. All passed without any problems. The See Level tank monitors also worked properly. While we don't have mattresses yet (the YKK zippers for the mattress covers are delayed:( I did bring in our two Thermarest air mattress pads and tested out the bed panel with a short nap (zzzz)! At first I tried with the panel in seating configuration (which at 21" is as wide as a regular Thermrest pad) but found that too narrow. My right arm kept falling off. After taking 15 seconds to pull the bed panel out to sleeping arrangement, I had a comfy 28" inches of width and had a great nap. We hadn't taken Redford out for a drive in quite some time. I also wanted to get into the rain and do some testing. Since I applied Dicor lap sealant around all of the openings in the roof I wanted to make sure there was no water penetration. After a short drive in the rain the DC to DC charger got the battery back to 100% and the heavy rain during the drive did not show any signs of penetration. PHEW!!! Redford will stay outside tonight in the rain and I'll check everything again in the morning.
0 Comments
Leave a Reply. |
AuthorCalvin here - after spending almost 33 years in education as a high school teacher, elementary teacher, and elementary administrator, it was time to retire! I did so happily and with no regrets; it was a terrific and fulfilling career. I do enjoy building projects as the design and building process is very therapeutic and you see a completed functional product in the end. Now to combine the build with another of Angela's and my passions - travel - is something we're really looking forward to. Archives
September 2022
Categories |

 RSS Feed
